Category Archives: Lavender recipes featured at the Sun Valley Harvest Festival which is rated by Fodor as one of the Top 10 Fall Festivals

Lavender (Or Not) Puffs

Standard

Lavender (or Not) Puffs

Makes 3 dozen cookies

IMG_3890
lavender

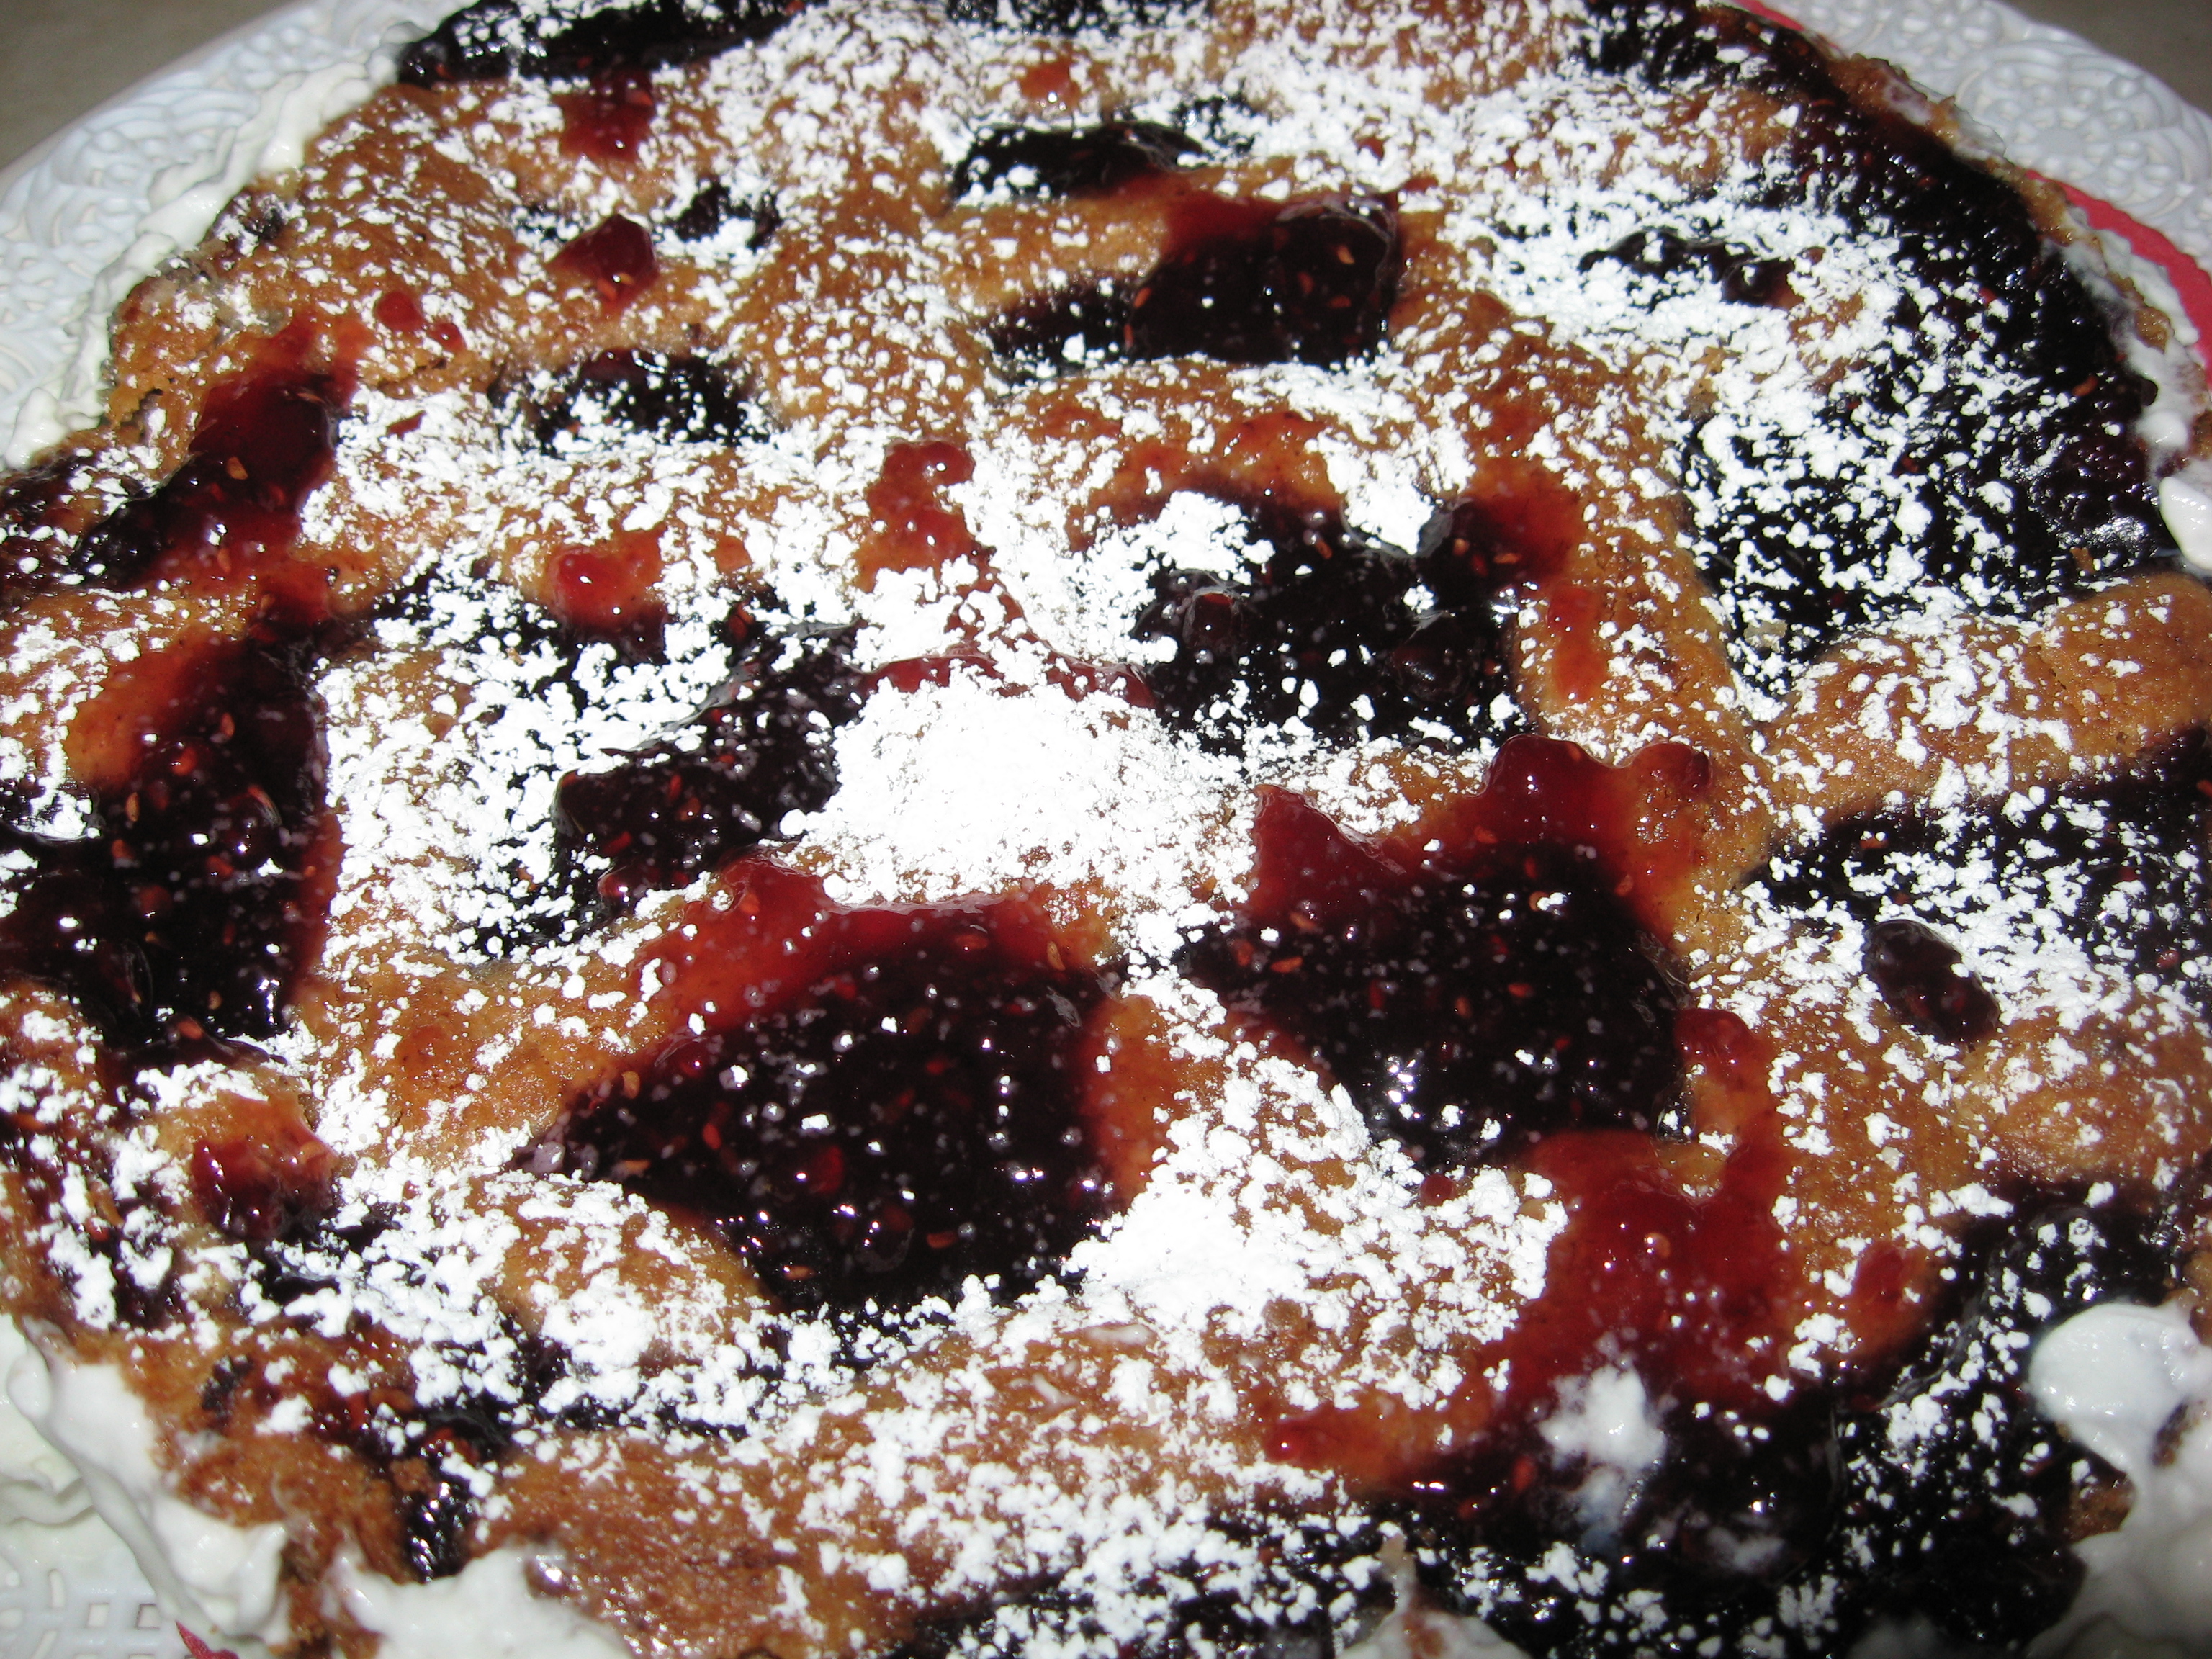
(Puff in foreground of plate pictured above)

Here’s is cookie that everyone likes.  And—it’s so very easy to make.  It also freezes well.  So what more can you want———Furthermore, you can make them without the lavender.

Ingredients:

  1. 1 ½ C. all purpose flour
  2. 1/2 C. Cornstarch
  3. 1/4 Tsp. salt
  4. 1 Tsp. culinary lavender buds
  5. 1/4 C. confectioners/powdered sugar
  6. 1 Tsp. vanilla extract (the real thing is sure better than the imitation kind)
  7. 1/4 to 1/2 C. powdered sugar for last minute dusting

Instructions:

  1. In a medium sized bowl whisk together the flour, cornstarch, salt and lavender buds.
  2. In another medium sized bowl, beat the butter and sugar until creamy and smooth (about 2 minutes).
  3. Beat in the vanilla extract and then add the flour mixture and beat until just incorporated.
  4. Cover and put in the refrigerator for an hour until batter is firm. If it seems to firm when you have removed it from the refrigerator, let it sit out for a bit.
  5. Pre-heat oven to 350 and line cookie sheets with parchment paper.
  6.  Form 1-inch balls and place on your prepared cookie sheets about 1-inch apart.
  7. Bake for about 10-14 minutes (mine took 12 minutes here in Sun Valley) until the edges just start to brown.
  8. Remove from the oven and place on wire racks that have been placed above paper towels to cool for about 3-5 minutes.
  9. Put the extra powdered sugar in a fine strainer/sieve and sprinkle the tops of the cookies with the sugar.
  10. Place in an airtight container and they will keep for a couple of weeks.  I froze mine and they taste just fine out of the freezer.  You may want to refresh the powder sugar dusting before serving if they had been frozen.

Victorian Lavender Cookies with Rose Water Icing

Standard

Victorian Lavender Cookies with Rose Water Icing

Makes 4 dozen cookies

(In the left picture, shown in the foreground and not those with the jam)

 margot 244 (2) lavender

This is another cookie that I served at the Sept. 22, 2013 Sun Valley Harvest Festival’s Grand Tasting.  It was a big hit.  The combination of the lavender and rose water is so beautiful and tasty.  I have frozen these cookies with the icing and they taste just fine; however the rose water icing doesn’t seem to have as strong a smell as when first put on but it still tastes like rose water.

Ingredients for the cookies:

  1. 1/2 C. Sweet Butter
  2. 1 C. Bakers Sugar
  3. 2 Eggs
  4. 1 Tsp. Culinary Lavender, crushed
  5. 1 ½ C. flour
  6. 2 Tsp. Baking Powder
  7. 1/4 Tsp. Salt

Directions for the cookies:

  1. Preheat oven to 375.
  2. Cream together the butter and sugar. Add the eggs and lavender.
  3. Whisk the flour, baking powder and salt together and add to the butter, etc. mixture.
  4. Drop by teaspoons onto a cookie sheet that has been lined with parchment paper.  I lined mine 3 across because they do spread out flat-about 2” or so.
  5. Bake for about 10 minutes.  Watch carefully to see that the bottoms don’t get too brown.  Mine here took about 8-9 minutes.
  6. Let cookies sit a minute on the cookie sheet and finishing cooling them on racks.

Ingredients for the Rose Water Icing: (I started with ½ of this recipe and that’s about all I used.  You may want more though.)

  1. 2 C. Powdered Sugar
  2. 5 ½ Tsp. water
  3. 6 ½ Tsp. Rose Water (can be procured at Atkinsons’-about $5)

Icing Directions:

  1. In a small bowl, mix the powdered sugar with the water and rose water.

Finishing Directions:

  1. When the cookies have cooled, drizzle over them the icing.


Lavender Shortbread Bites

Standard

lavender

Lavender Shortbread Bites

Makes about 40 square 1 inch bites

 Here’s an easy and yummy recipe to make for all the little goblins that come visiting you on Halloween or anytime for that matter.  You don’t have to put in lavender, however I did and presented this as an appetizer course at my presentation at the Sun Valley Harvest Festival’s Grand Tasting last Sept. 22nd.  I thought that the lavender gave it a nice little tasty twist but use your imagination for another like ingredient if you wish such as cinnamon, rosemary, etc.

 Ingredients:

  1. 1 ¼ C all-purpose flour
  2. 3 Tblsp. sugar
  3. 1/2 C. butter at room temp is best (1 cube and I used salt-free)
  4. 2 Tsp. dried lavender
  5. 2-3 Tsp. Lemon zest (or grated lemon rind-finely or not is up to you.)
  6. Sifted powder sugar for final dusting when bites are done

Directions:

  1. Preheat oven to 325.
  2. In a medium bowl, whisk the flour, sugar, lavender and lemon till blended.
  3. Using a pasty cutter or two knives, cut the butter into the dry, lemon, lavender ingredients till the mixture resembles fine crumbs and starts to cling.
  4. Form mixture with your hands into a ball and knead till smooth (this won’t take long).
  5. Roll or pat dough on a cookie sheet that has been lined with parchment paper.  I patted the dough on the cookie sheet sized parchment paper on my counter top and placed some saran rap (or another piece of parchment paper would do) on top. I then rolled the dough to my desired thickness.  The recommended rolled size could be anywhere from 8 X 5 inches to 12 X 10 inches.  I do the 12 X 10 inches but if you want thicker cookies, your roll size should be smaller.  When you have finished rolling the dough, place the bottom parchment paper with the dough on your cookie sheet. Discard the top saran rap sheet. Then cut/score through the dough into the size cookies you wish.  I made 1” bites.
  6. Place the cookie sheet in the oven and bake for about 18-20 minutes or till lightly browned on top.
  7. Remove from oven, let sit for just a bit and then break the bites apart gently and transfer them to a wire rack to cool.  If you place some paper towels or something similar under the wire rack, it’ll be a breeze to dust them with the powder sugar if you wish to do that.
  8. Store the bites in a tightly covered container for up to 3 days or in the freezer for up to 3 months (thaw before serving).
  9. Try hard not to eat them all at once.

Lavender Lemonade

Standard

lavenderIMG_3887

Lavender Lemonade
Makes 2 liters or 1/2 gallon

I served this at my Lavender Inspired Table at the Sun Valley Harvest Festival’s Grand Tasting tour on Sept. 22, 2013.  Everyone, and I sincerely mean everyone, just loved it.  It really is a wonderful drink for spring or summer.  But actually, it wouldn’t be that bad for winter either and you could introduce some Christmas décor for a holiday treat.

Ingredients:

  1. 2 cups lavender syrup
  2. 1 cup freshly squeezed lemon juice
  3. 5 cups water
  4. Lemon slices (for garnish)
  5. Ice with lemon rind inserted before freezing

Directions:

  1. In a large pitcher, combine the lavender syrup, lemon juice, and water.
  2.  Pour into glasses over prepared ice, and garnish with some pretty lemon slices!
  3. Or put in a punch bowl, pitcher or the perfect lemonade server with a spigot on the side (as shown in the picture).


Lavender Syrup
Makes 2 cups

  1. 2 cups water
  2. 1 1/2 cups sugar
  3. 2 tablespoons dried lavender buds

Directions:

  1. In a small saucepan, bring the water, sugar, and lavender to a boil. Remove the pan from heat, then cover with a lid and let the lavender steep for at least half an hour however I let it steep overnight for best results.
  2. Strain the mixture into a jar or bottle.
  3. It will keep for a week or two in the fridge during which you can add it to iced tea, hot tea, seltzer, gin or vodka concoctions, champagne, limoncello, or… this lovely lavender lemonade! As for the hard liquor, I found that it pairs beautifully with Basil infused vodka. I also heard that it will keep longer if you introduce a bit of vodka in it before storing.

Raspberry, Lavender and Chocolate Jam

Standard

Raspberry, Lavender and Chocolate Jam

lavender

makes enough to fill six 8 oz. jam jars

I and my B&B styled catering service “ From Margot’s Table to Yours” had a wonderful fun time participating in the Sept. 22nd Sun Valley Harvest Festival’s Grand Tasting event.  It was made even better by having Donna Anderson from her Lavender Acre’s Farm there to help along with a good artist friend of mine, Susan Snyder. As I had previously promised here is a very lovely lavender inspired recipe that I wanted to share.  I had made it to put on my lavender thumb print cookies;however, you don’t need to use this jam just for the cookies because you’ll love having it in crepes, on ice cream and with croissants. It also makes a nice hostess gift.


Ingredients:

  1. 8 1/2 Cups Fresh raspberries
  2. 3 Cups sugar
  3. 2 Tablespoons freshly-squeezed lemon juice
  4. 1 1/2 Cups bittersweet chocolate chips
  5. 1 Tablespoon fresh culinary lavender buds
  6. 6 Sterilized, cool and dry 8 ounce jam jars


Instructions:
1. Stir to combine raspberries, sugar and lemon juice in a heavy bottomed saucepan. Turn the heat to medium and let the mixture simmer, slowly stirring, for around 5 minutes. If any foam develops on the surface, skim it off. Remove the saucepan from heat and set aside.
2. Off the heat, stir chocolate and lavender into the raspberry mixture until the chocolate has melted completely. Transfer the mixture to a large bowl. Cover the bowl with parchment paper and refrigerate it overnight so the flavors can meld.
3. Simmer raspberry mixture in saucepan over medium heat for about 10 minutes, skimming off any foam that forms.

4. Remove from heat, let cool a bit and transfer to your clean jam jars. You can refrigerate without sealing for up to a month or you can place melted paraffin in the jars so as to be able to store for a longer period of time


For easy access and printing of this and past recipes, visit Margot’s blog http://blog.tempinnkeeper.com  Call Margot for personal cooking help or hosting

 @ 721-3551.

Margot is a self-taught enthusiastic & passionate cook. Having been an inn-keeper for 5 years at her own inn, she accumulated a lot of good recipes which she loves to share.


No-Churn Ice Cream Recipe # 2 with various fruits and/or LAVENDER culinary buds

Standard

lavenderNo-Churn Ice Cream Recipe # 2 with various fruits and/or LAVENDER culinary buds

Makes 4 pints

Here’s another WICKED recipe.  I  have received a lot of comments and compliments on my other fast, easy and yummy no-churn ice cream recipe so I thought I’d give you all another recipe which I also like a lot.  I think that it turns out a bit softer than the other one.  It’s excellent served in a pretty glass layered with fresh fruit and this ice cream.

Ingredients:

  1. 4 egg whites
  2. 1 ¾ C. superfine sugar
  3. 2 ½ C. heavy cream
  4. 2 ripe mangoes, flesh roughly chopped into 1-inch chunks, strawberries cut in smaller pieces, whole raspberries or blueberries ; peaches, apricots, banana cut in bits; add some chocolate chips; and for Lavender, add 1/2 C. lavender simple syrup and reduce the amount of heavy cream to 2 cups.

Instructions:

  1.  In a glass or metal bowl, beat the egg whites till thick.
  2. Add the sugar and beat until stiff.
  3. Add the cream and continue beating until mixture is thick and creamy.
  4. If you wish to make the lavender version, beat everything before adding the simple syrup.  When your mixture is thick and creamy in step 3, beat in the simple syrup in several additions.
  5. Gently fold in the fruit or fruit pieces.
  6. Cover and place in freezer until almost set (3-4 hours)
  7. Take, out and beat once more.  Put in airtight containers in the freezer overnight.

Lavender Simple Syrup Recipe (Makes 2 Cups):

Ingredients:

  1. 2 C. water
  2. 1 ½ C. superfine sugar
  3. 2 Tblsp. dried culinary lavender buds

Instructions:

  1. In a small saucepan, bring the water, sugar and lavender to a boil.  Remove the pan from the heat and then cover with a lid.  Let this mixture steep for at least 1/2 hour however, I let it steep overnight for best results.
  2. Strain the syrup into a jar or bottle.  It will keep for a week or two in the fridge during which you can add it to iced tea, hot tea, hard liquor concoctions (basil flavored vodka works fabulously well), champagne, or lemonade (look for my separate recipe for that under Lavender Lemonade). I’ve heard that it will keep better if you introduce some vodka in the syrup.

For easy access and printing of this and past recipes, visit Margot’s blog http://blog.tempinnkeeper.com  Call Margot for personal cooking help or hosting

 @ 721-3551.

Margot is a self-taught enthusiastic & passionate cook. Having been an inn-keeper for 5 years at her own inn, she accumulated a lot of good recipes which she loves to share.

From Margot’s Table to Yours Menu for the Grand Tasting at the Sun Valley Harvest Festival (rated by Fodor as one of its Top 10 Fall Festivals)

Standard

margot 244 (2) margot 245 (2)IMG_3883 IMG_3884 IMG_3885 IMG_3886 IMG_3887 IMG_3888 IMG_3889 IMG_3890sun valley harvest festlavender

Margot will have her lavender recipes on her blog by Monday, Sept. 30, 2013 so be sure to check in next week.

“Let Lavender Make Your Day”

Menu Presented By

“From Margot’s Table to Yours” B&B Styled Catering

For The Sun Valley Harvest Festival Grand Tasting at Carole’s Dollar Lodge on Sunday, September 22, 2013 which benefits The Sun Valley Culinary Institute

Margot’s theme choice of Lavender is in keeping with the Sun Valley Harvest’s mission.

Lavender is regional, sustainable, healthy and delicious.


Participating with Margot will be regional Idaho lavender expert Donna Anderson

 Owner of Lavender Acres located in the heart of the Treasure Valley in

Meridian, Idaho

(Questions about lavender? Make sure to ask Donna)


Appetizers

Lavender Bites

Main Course

Lavender Linzer Torte

Desert

Thumb Print Cookies with Margot’s Homemade Raspberry Chocolate Lavender Jam and Other Assorted Lavender Sweet Delights

Beverage

Lavender Lemonade

Linzer Torte and an option of mini-tortes and a bonus of Meringue Kisses

Standard

Linzer TorteLinzer Torte

Serves 8 (but don’t expect any leftovers)

Festive for anytime of the year


linzer torteindividual-mini-ltmeringue-kisses


Linzer Torte ( in a large spring form pan or mini kinds)

Serves 8 or makes 36 mini Linzer Tortes

Bonus recipe for no-waste egg white Meringue Kisses (makes 30)

Ingredients:

  1. 1 ½ C. sifted flour
  2. 1/4 Tsp. salt
  3. 1 C. sifted sugar
  4. 1 C. sweet butter, room temperature –2 cubes
  5. Grated rind of 1 lemon
  6. 3 egg yolks (keep them separated in their shell half) and save the egg whites in another bowl
  7. 1 C. slivered almonds, blanched or un-blanched (I mostly use the blanched ones); grind them in a grinder( I use my mini-Cuisinart) and then add 1/2 Tsp. cinnamon and 1/4 tsp. ground cloves and grind the nuts with these spices a bit more.  
  8. 1- 10 or 12 oz. jar jam (NOT JELLY or it will leak like mad) of your choice. If you wish, you can mix in well 1 ½ Tblsp. Brandy in it.   Traditionally the torte was made with Lingonberries but you can use your imagination for whatever you wish however makes sure that the filling is of a substantial consistency.  I use the Red Raspberry Preserve bought straight from the store.
  9. Turbinado Sugar for light dusting before baking.
  10. Confection sugar for the final dusting just before serving; Fresh berries for final décor.                                                                                                            Directions:
  1. Preheat oven to 375F AFTER your dough has been refrigerated for an hour or more.
  2. In a bowl, sift the flour once more with the salt.
  3. In a larger bowl, cream the sugar with the butter with electric beaters until the mixture is light and fluffy.(about 3 minutes).
  4. Add the grated rind of 1 lemon to this mixture (juice the grated lemon for the meringues) and then add the 3 egg yolks (one yolk at a time) beating well after each addition. (Save 2 of the egg whites in a separate bowl and let sit at room temp to make easy and delicious meringues. See recipe below.)
  5. Gradually add the dry ingredients (in about 3 divisions for each) to the creamed mixture alternately with the 1 C. ground almonds which has been already mixed with the cinnamon and cloves.
  6. Chill the dough in the refrigerator for an hour or more. If it becomes too cold to be pliable when you remove it, leave it out for a bit and keep testing it for the right pliability.
  7. Prepare an 8”,9”,or 10” spring-form pan. This will take a bit of time so patience please. First measure the round pan pieces on parchment paper; with a pencil draw its circle and cut it out. Save the left over pieces to fit around the pan sides. Before placing the parchment paper in the pan, brush the bottom and sides with Crisco oil, then place the parchment paper pieces on the oiled bottom and around the oiled sides. Then brush the parchment side and bottom once more with Crisco oil. Then lightly dust some flour on the bottom and shake the pan all over so that the sides get flour dusted as well. Then carefully shake out any residual flour.
  8. First, before placing the dough on the bottom of the pan, save a fist full of dough for making the top decorative strips. You’ll probably want about 6-8 strips. (See picture above.)The remainder of the dough place on top of the bottom of your prepared pan. Then with your knuckles, gently spread the dough over the bottom and up the sides about one and a half inch up.
  9. Spread the dough with the jam of your preference. I use a rubber spatula to do this. If you have homemade jam, all the better—but no jelly please.
  10. Now is the time to roll with your hands several long thin strips to use as a lattice. Intertwine the strips so that it’ll look pretty when served and place each on top of your torte. If the strips break when placing them on top don’t worry—just combine them in any way to make a long strip.  Rustic is the theme here.
  11. Then, lightly sprinkle it all with Turbinado Sugar which will make the top look a little shinny.
  12. Place the torte on a pizza or cookie sheet that has been lined with parchment paper (not aluminum foil because of possible extra heat conducting).This is because your torte may possibly leak.
  13. Bake the torte in your preheated 375F oven on the middle rack for 30-45 minutes till it is golden brown on top and the jam is slightly bubbling. I watch it carefully so that it doesn’t get overdone and too brown because then the crust will be tough.
  14. Cool the torte thoroughly and then gently run a steel spatula or a sharp knife around the sides to make sure it’ll release properly after unlatching. Then place the torte, covered with aluminum foil or saran wrap, in the refrigerator for several hours or even overnight. It must be very cold to release properly. Then unlatch the pan and the torte should release easily. Then you can run a knife under the bottom or just under one tiny side just to make sure that it will lift. At this point, I can usually tip the torte (with the pan’s bottom still on) on its side. It should come apart easily. At this point you can tear off your bottom parchment sheet. Place the torte on whatever dish you wish to use to serve it. I many times use a Chinette plastic plate for the top and bottom which then allows me to wrap it well, store it in the refrigerator for a week or so or wrapped well in the freezer safely without fear of breakage. The torte freezes just beautifully and you’ll be hard pressed to notice it when serving it. Before last minute serving, if you wish, you can spread a little more jam in the holes and dust it all with powdered sugar. Then you can surround your torte with fresh raspberries which does present a nice look.
  15. You can also make mini-cupcake like Linzer Tortes. I use the mini-cupcake paper liners which I brush lightly with the Crisco oil and follow the same directions as for a large one. Bake them in a mini-cup cake pan from anywhere from 12 to 15 minutes in a 375F oven. Watch carefully so they won’t get overdone.  Use your middle oven rack.  One recipe will make 36 mini-cupcake-like Linzer Tortes.            


Meringue Kisses—makes about 30

Ingredients:

  • 2 large egg whites @ room temp
  • 2 tsp. fresh lemon juice
  • 2/3 C. granulated white sugar


Directions:

  • Preheat oven to 225F.
  • Line a large baking sheet with parchment paper.
  • In a medium size bowl, with your electric beaters using the whisk attachment beat the egg whites at a medium-low speed until foamy.
  • Add the lemon juice and beat at medium speed until the whites begin to form soft peaks.
  • Add the sugar one third at a time, then increase the speed to high and beat until stiff peaks form.
  • With a spatula and a small butter knife to help slip the mixture off, pick up some of this mixture and drop onto your parchment covered baking sheet. Let your drops go upwards to form the “kiss” mode (like those chocolate ones).  The size can be around 2” circumference rounds. You should be able to place all of the kisses on a 17” X 12” pan.  Also, you can place around 4 or 5 across—they don’t spread much.
  • If you wish you can sprinkle sifted good chocolate unsweetened cocoa and a dusting of fun colorful cake décor sprinkles. (see picture)
  • Bake for about 60 to 70 minutes until they are firm to the touch and seem thoroughly dry.
  • Store the “kisses” in an airtight container for up to 2 months.


Page 3/3