Monthly Archives: January 2013

Spiced Pear Jam with Pineapple

Standard

5 pears

Spiced Pear Jam with Pineapple

I had some Bosc pears left over from a catering job I had where I presented my wonderful Poached Pears and I knew that I needed to make use of them quick like before they went bad.  Jam is easy to make and so nice to give for hostess gifts.  So, I looked through my old array of recipes and found this.  It turned out really good and I think that you could even use it for an appetizer by placing a dab on some cream cheese that has been placed on a baguette slice.  Then you could surround the baguette slices with slivers of fresh pears. It also would be good on some peanut buttered toast.  Oh well, up to you—————

Ingredients:

  1. 7 or 8 firm pears (about 3 lbs. worth)
  2. 1 orange
  3. 1 lemon
  4. 1 C. canned and drained crushed pineapple
  5. 4 C. sugar
  6. 3-4 whole cloves
  7. Two sticks of cinnamon
  8. One inch piece of fresh ginger

Directions:

  1. Peel and core the pears
  2. Put the pears, orange and lemon in a processor and rough chop process.
  3. Place the above mixture in a large pot and add the pineapple, sugar, cloves, cinnamon and ginger.
  4. Place pot on medium high heat and stir fairly constantly until it comes to a boil.
  5. Reduce the heat to a medium high or even a bit lower so that the mixture will  be gently simmering for at least 30 minutes but most likely around 45 minutes.  Do watch it and stir it every 10 minutes or so.
  6. When the mixture becomes thick (test it by taking a bit out, putting it in the freezer for several minutes to see if it’s the consistency you desire) take it off the heat and let it cool.
  7. Hopefully you have put out some jam jars that you have sterilized in your dishwasher so that when the jam has cooled you’ll be able to place the jam in the jars and then put your paraffin on top.
  8. Save some to put in the frig for yourself to enjoy immediately.

Roasted Turkey Breast and that little blue button

Standard

IMG_3182 IMG_3184 IMG_3191

Roasted Turkey Breast and that little blue button

Probably 3- 4 servings for a 3 pounder

I really wanted to cook a pot roast, but oh my goodness, the prices of pot roasts were unbelievable.  What happened to a good price for a supposedly lesser cut of beef?  So I ended up buying a 3 lb. turkey breast with a bone.  It was well priced.  Turkey breasts can be so dry sometimes so I thought that I would experiment and try to cook it in a way to increase the moistness.  Indeed, the way I cooked it worked however, that little blue button that was inserted—supposedly to tell you when it’s done—no way.  So, beware because it’s not always correct.

Ingredients:

  1. One 3 to 5 lb. turkey breast, bone in
  2. 2- 3 Tblsp. butter or olive oil (I used butter)
  3. S&P to taste
  4. Italian seasoning
  5. Bay Leaf
  6. One small sprig of fresh rosemary
  7. 1 large chopped carrot
  8. 2-3 stalks of celery, chopped
  9. 1/2 to 1 onion chopped

Directions:

  1. Preheat oven to 325.
  2. Wash the breast, wipe it dry and season it with S&P and some Italian Seasoning.
  3. In a large oven proof skillet, melt the butter or heat the olive oil over medium high heat.
  4. Add the vegetables and sauté them for about 5 minutes—till they are glistening but not browned. Remove and set them aside.
  5. In the same skillet, over medium heat, brown the turkey breast that you have seasoned with S&P and Italian seasoning. Brown each side for about 4 minutes per side.
  6. Set aside the breast and place the veggies back in the skillet.  Then place the breast over them.  Add the bay leaf and rosemary sprig.
  7. At this point, I sprayed some olive oil cooking spray over the breast.  Place the skillet in the oven.
  8. I figured that it would take 1 ½ hour to cook (30 min. per lb.).  Every 15 minutes or so, I would baste the breast with the drippings and at the 1 hour point, the blue button popped out.  So, of course, I cut into the breast and no way, Jose—it was not done.  It did take another half-hour.  But all in all, this was an easy way to cook a turkey breast and it turned out super moist and tender.

Oh Hale to the Ole’ Pot Roast- 7 Different Ways

Standard

511px-BeefCutChuck.svgOh Hale to the Ole’ Pot Roast- 7 Different Ways


The poor relative of a better cut of meat, the pot roast was always considered a non guest dish.  I want to disagree with this image because truly, a good pot roast is not only an art to make but also a delicious dish to serve—for your family and guests. A good pot roast takes a bit more effort to make because the meat is not from the more elegant cut of the animal. However, this is what can make a pot roast more delectable because of the special seasonings used, the sometimes tender and time staking marinating and the always cautious cooking that it takes. The main trick of presenting a superior pot roast is to not overcook it, make sure about the heat used and to be able to spend quality time checking in on it.  Here are several recipes I have always enjoyed in regards to the potting of the roast.  PS—in regards to making your gravy, remember to thicken the liquid at the end of cooking by either using corn starch mixed with water (2 Tbsp. to 1/4 C. cold water for about 2 C. cooking liquid) and then whisk it slowly into the hot liquid; or if you don’t want to use corn starch, in a different skillet, melt some butter and then add some flour—whisk it till smooth and then stir in some of your hot liquid, a bit at a time. ( For the flour method the approximate correct measurements to use are the following: 1 ½ Tblsp. butter, 1 ½ Tblsp. flour to 1 to 1 ½ C. liquid.)

  1. 1.    The Basic Pot Roast

Ingredients:

  1. 1 (3-4 lb.) piece of chuck or rump roast (tied if necessary)
  2. 2 bay leaves
  3. 1 or 2 garlic clove—peeled and chopped fine or slivered
  4. Sea Salt and Ground Pepper
  5. 2 or more Tblsp. unsalted butter
  6. 2 Tblsp. olive oil
  7. 3 Tblsp. chopped raw bacon in small pieces
  8. 3/4 to 1 chopped onion—rough chop
  9. 2 large peeled and chopped carrots in small slices
  10. 3 celery stalks chopped in small slices
  11. 1/2 C. chopped parsley-add at the end
  12. 2-3 Tblsp. flour to add to the veggies at end
  13. 1/2 C. wine
  14. 1 to 2 C. chicken, beef or vegetable stock-I like a good beef stock
  15. 3/4 Tsp. of your favorite dry blend of spices
  16. Optional: 3/4 warm sour cream

 Directions:

  1. Salt and pepper the roast and insert 1/2 of the garlic slivers as well as 3/4 of the bacon into several slits that you have made in the roast. ( For a different kind of roast, rub the meat with 1 Tblsp. of mild chili powder- if you like hot use cayenne.)
  2. Heat the oil and butter over medium-high heat in a Dutch oven or other heavy pot that can be later lidded; brown the roast on all sides—take your time to do this and make sure the heat is not high.  You do not want the fat to burn.
  3. Remove the meat to a side platter and in the oil/butter, still over medium high heat, brown the vegetables-stirring frequently. Stir them until softened and somewhat (not too much) browned—about 10 minutes. Add the parsley towards the end. Before adding the stock, add 2 to 3 Tblsp. flour to the vegetables and stir it till you can’t see any white of the flour left.
  4. Add about half the stock (and warm sour cream if you wish) and the red wine, your blended spices and return the roast to the pot, and turn the heat to very low however the liquid should be simmering at all times. (Save the other half of the stock to use if you find the stock disappearing).  There should be at least 1/2 inch of liquid in the pot at all times.
  5. Here’s where you need to spend time with this recipe. Every 15 minutes or so, turn the meat—and cook it until it is fork tender which means that your fork will pierce the meat without pushing too hard and the juices will run clear—about 1 ½ to 2 ½ hours—but it may be longer if the roast is higher than it is long.  A very thick roast can take as long as (sigh) 4 hours. (You can also bake a roast, covered, in a slow oven—300- 325 degrees—but you need to turn and look at it every 15 minutes just as if you cook it on top of your range. I prefer to do it stove top)
  6. If for some reason your roast seems to be dry (oh no) your heat has been probably too high.  DO NOT OVER COOK THE ROAST. Believe me, when the meat is tender, it is done and remember, even when you remove it from the heat—it still will cook for 15 minutes or so.
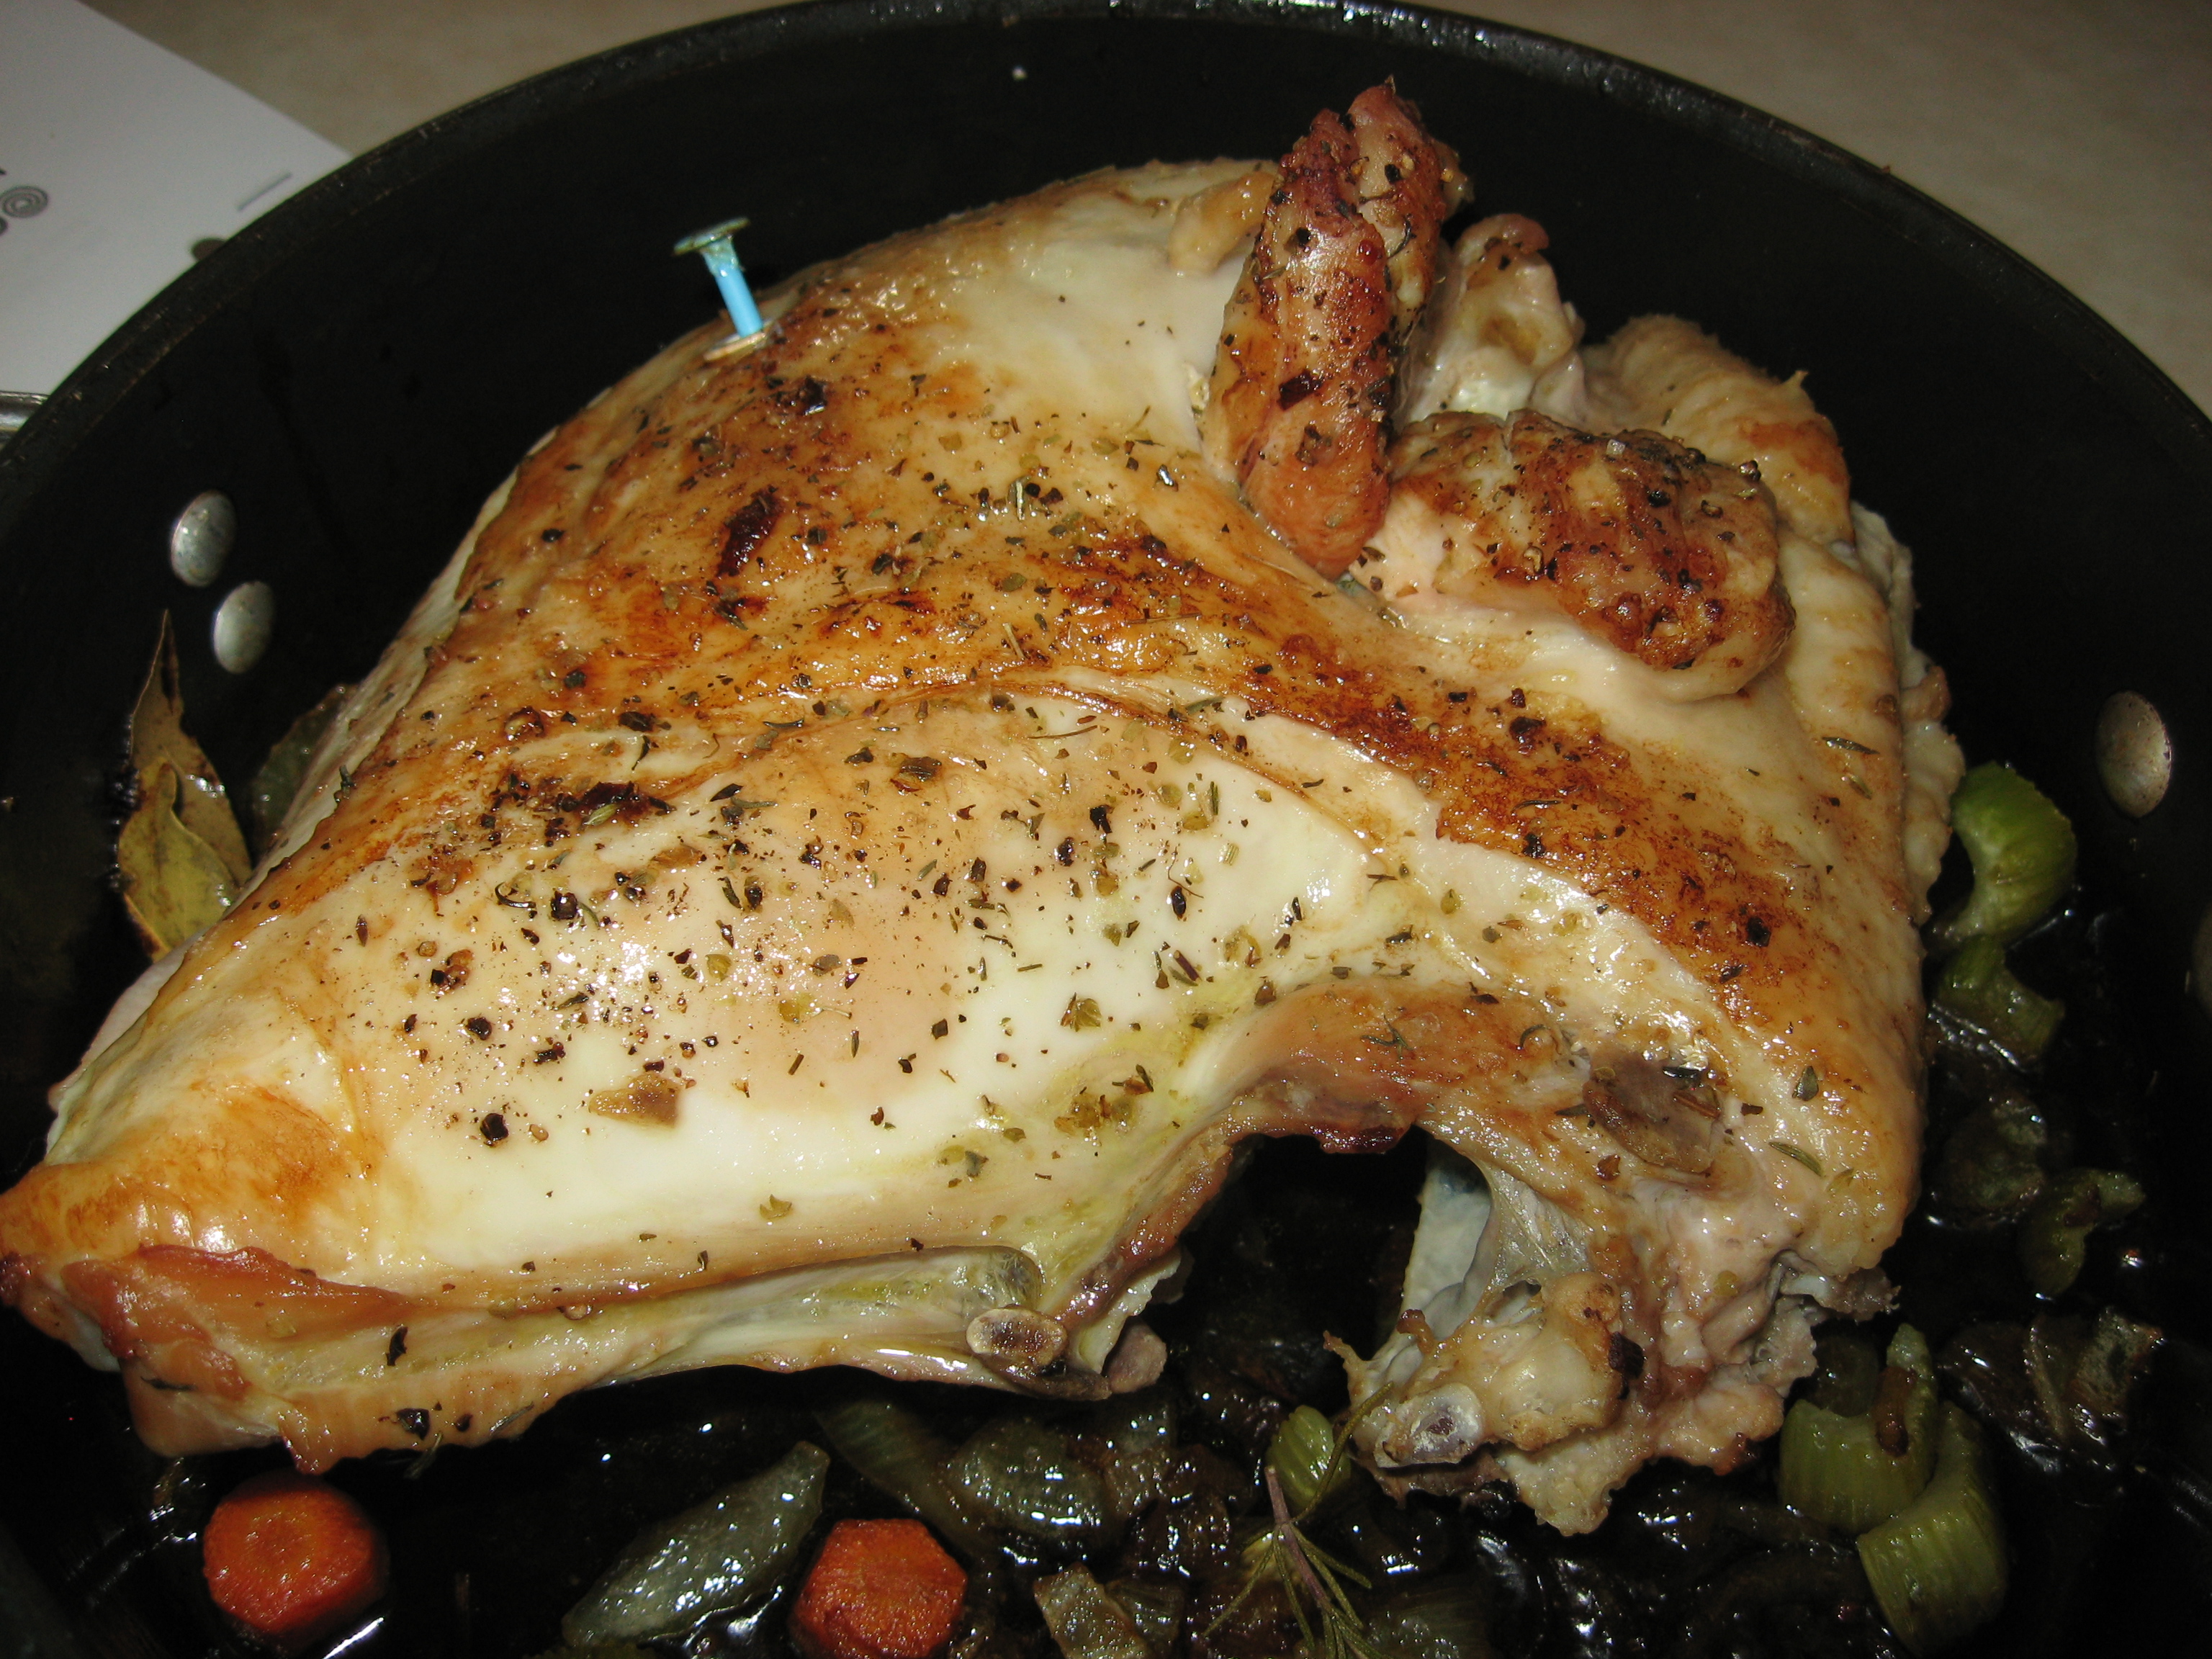
  7. The Final Step: Remove the meat to a beautiful platter and keep it warm with some aluminum foil.  Skim the fat (if any) from the juices in the pot and turn the heat to high.  Cook, stirring and scraping the bottom of the pan until the liquid is thick and almost evaporated.  Adjust for seasonings.
  8. Serving: slice your meat and serve the juices on the side.  Or if you wish, pour the juices over the meat.
  1. 2.    Pot Roast with Tomatoes

Prepare and cook meat as above except:

  1. For the liquid, use 1 C. stock and 1 C. canned tomatoes. There should be about 1/2 inch of liquid in your pot.
  1. 3.    Pot Roast with a Sour and Sweet Gravy
    1.  When the roast has been set aside, in your stock, you can add 1 tsp. of sugar and 1 ½ Tblsp. lemon juice or vinegar.


  2. 4.    Pot Roast with Cider
    1.  Soak your meat for 12 hours in this marinade and also use this marinade in the stead of the liquids mentioned above and cook as in the basic recipe:

Cider Marinade Ingredients:

  1. 2 C. cider
  2. 2 small sliced onions
  3. 1/4 Tsp. ginger
  4. 3 cloves
  5. 1/4 Tsp. cinnamon
  6. 2 Tblsp. sugar
  1. 5.    Spiced Pot Roast

Spiced Beef Marinade ingredients:

  1. Cider vinegar or dry wine
  2. 2 sliced onions
  3. 1/2 Bay leaf
  4. 1 Tsp. Cinnamon
  5. 1 Tsp. allspice
  6. 1 tsp. cloves
  7. 1 ½ Tsp. salt
  8. 1 Tsp. pepper

Vegetables to use for the last 1/2 hour of cooking

  1. 2 onions
  2. 4 large carrots
  3. 1 medium large turnip
  4. 1 stalk celery
  5. Marinade the roast in the above marinade for 12 hours or more.
  6. Take the meat out and place it in a roasting pan. (Save the marinade)
  7. Heat the following to a boiling point and pour it over the roast which you’ve placed in a pot that has a lid: 1/2 of the marinade and 2 C. water.
  8. Cover the pot and roast it in a slow over, 275 degrees, for 3 hours.
  9. Process the vegetables to a small grind and sauté in butter till golden brown. Add these ingredients to the roast for the last 1/2 hour of cooking.
  10. The sauce can be thickened with flour or corn starch.
  1. 6.    Pot Roast with Cranberries

Follow rule for basic pot roast and substitute for the liquid water and after 1 hour of cooking, add 2 C. of raw cranberries and additional boiling water if needed.

  1. 7.    Sauerbraten

Ingredients:

  1. 3 lbs. roast
  2. Bacon which you have larded in the meat
  3. Pepper rubbed on meat
  4. Garlic inserted in slits made in meat
  5. Equal parts mild vinegar or white wine and water
  6. 1/2 C. sliced onion
  7. 2 bay leaves
  8. 1 Tsp. pepper corns
  9. 1/4 C. sugar
  10. For the very end, 1 C. sour cream or sweet cream

Directions:

  1. Place prepared meat in a crock like pot
  2. Heat but DO NOT BOIL the ingredients e through i and while hot, pour over the meat.
  3. Place in refrigerator for at least 3 days but preferably 7 to 10 days.

Turn the meat once a day.

  1. When the meat is well marinated, take it out and place it in a pot.
  2. Use the vinegar mixture in place of the stock.
  3. Cook as in the basic recipe and when the meat is tender, remove it from the pot.
  4. Thicken the gravy with flour and add 1 C. sweet cream or sour cream

Any of these recipes are delicious served with potato dumplings, noodles and a hearty red wine.

Bon Appetit

Oven Baked Cinnamon Sugar Tortilla Strips and South of the Border Berry Salsa

Standard

sugar cin. tortilla strips

Oven Baked Cinnamon Sugar Tortilla Strips and South of the Border Berry Salsa for appetizers

Serves 8

This is such an easy delectable tidbit to make as an accompaniment to a nice fruit dish or even just for a good nibble or as guest appetizers (and maybe even desert?).  I served it with a Mexican breakfast consisting of my Mexican Egg Casserole which I served with Peppered Corn Muffins and a beautiful bowl of freshly made Poached Pears with Cinnamon and Fennel.  Of course, kids will really go for these and probably you will too.  So beware—put them away before you or your family  eat them all.

Ingredients:

  1. 8 inch Corn or Flour Tortillas—at least eight—the fresher the tortilla the better
  2. 1/2 C. Sugar
  3. 1 Tsp. Cinnamon

Directions:

  1. Preheat oven to 375.
  2. Cut the tortillas with a pizza cutter or a serrated knife in 8 long strips.
  3. Mix the sugar and cinnamon together.  I put this mixture in an empty spice bottle that had a shaker top on it. I actually did not use all of this mixture.
  4. Arrange the wedges on a large cookie sheet lined with parchment paper and spray the strips with nonstick cooking spray (I used olive oil spray).
  5. Immediately sprinkle the wedges with the sugar/cinnamon mixture—as much or as little as you wish.
  6. Bake the wedges in a preheated 375 degree oven for 10-12 minutes or until lightly brown and crisp.
  7. Let them sit for a minute or so.  If you are not going to use them immediately, place them in a paper bag and seal till ready to serve.

This goes very nicely with another appetizer:

SOUTH OF THE BORDER BERRY SALSA

Combine 1 cup fresh blueberries, 1 cup fresh sliced strawberries, 1 cup fresh raspberries, 1 seeded and finely chopped yellow bell pepper and 1 seeded and minced jalapeño chili in a medium bowl; toss gently. Add 2 tablespoons each of finely chopped red onion, finely chopped green onion and finely chopped cilantro; toss lightly. Combine 1 tablespoon each of cider vinegar, olive oil, freshly squeezed lime juice, orange juice and honey in a small bowl; mix well. Drizzle vinegar mixture over berry mixture; toss to coat. Serve in a large bowl or in individual bowls with the tortilla chips mentioned above.   Makes 8- ½-cup servings.

Linzer Torte and an option of mini-tortes and a bonus of Meringue Kisses

Standard

Linzer TorteLinzer Torte

Serves 8 (but don’t expect any leftovers)

Festive for anytime of the year


linzer torteindividual-mini-ltmeringue-kisses


Linzer Torte ( in a large spring form pan or mini kinds)

Serves 8 or makes 36 mini Linzer Tortes

Bonus recipe for no-waste egg white Meringue Kisses (makes 30)

Ingredients:

  1. 1 ½ C. sifted flour
  2. 1/4 Tsp. salt
  3. 1 C. sifted sugar
  4. 1 C. sweet butter, room temperature –2 cubes
  5. Grated rind of 1 lemon
  6. 3 egg yolks (keep them separated in their shell half) and save the egg whites in another bowl
  7. 1 C. slivered almonds, blanched or un-blanched (I mostly use the blanched ones); grind them in a grinder( I use my mini-Cuisinart) and then add 1/2 Tsp. cinnamon and 1/4 tsp. ground cloves and grind the nuts with these spices a bit more.  
  8. 1- 10 or 12 oz. jar jam (NOT JELLY or it will leak like mad) of your choice. If you wish, you can mix in well 1 ½ Tblsp. Brandy in it.   Traditionally the torte was made with Lingonberries but you can use your imagination for whatever you wish however makes sure that the filling is of a substantial consistency.  I use the Red Raspberry Preserve bought straight from the store.
  9. Turbinado Sugar for light dusting before baking.
  10. Confection sugar for the final dusting just before serving; Fresh berries for final décor.                                                                                                            Directions:
  1. Preheat oven to 375F AFTER your dough has been refrigerated for an hour or more.
  2. In a bowl, sift the flour once more with the salt.
  3. In a larger bowl, cream the sugar with the butter with electric beaters until the mixture is light and fluffy.(about 3 minutes).
  4. Add the grated rind of 1 lemon to this mixture (juice the grated lemon for the meringues) and then add the 3 egg yolks (one yolk at a time) beating well after each addition. (Save 2 of the egg whites in a separate bowl and let sit at room temp to make easy and delicious meringues. See recipe below.)
  5. Gradually add the dry ingredients (in about 3 divisions for each) to the creamed mixture alternately with the 1 C. ground almonds which has been already mixed with the cinnamon and cloves.
  6. Chill the dough in the refrigerator for an hour or more. If it becomes too cold to be pliable when you remove it, leave it out for a bit and keep testing it for the right pliability.
  7. Prepare an 8”,9”,or 10” spring-form pan. This will take a bit of time so patience please. First measure the round pan pieces on parchment paper; with a pencil draw its circle and cut it out. Save the left over pieces to fit around the pan sides. Before placing the parchment paper in the pan, brush the bottom and sides with Crisco oil, then place the parchment paper pieces on the oiled bottom and around the oiled sides. Then brush the parchment side and bottom once more with Crisco oil. Then lightly dust some flour on the bottom and shake the pan all over so that the sides get flour dusted as well. Then carefully shake out any residual flour.
  8. First, before placing the dough on the bottom of the pan, save a fist full of dough for making the top decorative strips. You’ll probably want about 6-8 strips. (See picture above.)The remainder of the dough place on top of the bottom of your prepared pan. Then with your knuckles, gently spread the dough over the bottom and up the sides about one and a half inch up.
  9. Spread the dough with the jam of your preference. I use a rubber spatula to do this. If you have homemade jam, all the better—but no jelly please.
  10. Now is the time to roll with your hands several long thin strips to use as a lattice. Intertwine the strips so that it’ll look pretty when served and place each on top of your torte. If the strips break when placing them on top don’t worry—just combine them in any way to make a long strip.  Rustic is the theme here.
  11. Then, lightly sprinkle it all with Turbinado Sugar which will make the top look a little shinny.
  12. Place the torte on a pizza or cookie sheet that has been lined with parchment paper (not aluminum foil because of possible extra heat conducting).This is because your torte may possibly leak.
  13. Bake the torte in your preheated 375F oven on the middle rack for 30-45 minutes till it is golden brown on top and the jam is slightly bubbling. I watch it carefully so that it doesn’t get overdone and too brown because then the crust will be tough.
  14. Cool the torte thoroughly and then gently run a steel spatula or a sharp knife around the sides to make sure it’ll release properly after unlatching. Then place the torte, covered with aluminum foil or saran wrap, in the refrigerator for several hours or even overnight. It must be very cold to release properly. Then unlatch the pan and the torte should release easily. Then you can run a knife under the bottom or just under one tiny side just to make sure that it will lift. At this point, I can usually tip the torte (with the pan’s bottom still on) on its side. It should come apart easily. At this point you can tear off your bottom parchment sheet. Place the torte on whatever dish you wish to use to serve it. I many times use a Chinette plastic plate for the top and bottom which then allows me to wrap it well, store it in the refrigerator for a week or so or wrapped well in the freezer safely without fear of breakage. The torte freezes just beautifully and you’ll be hard pressed to notice it when serving it. Before last minute serving, if you wish, you can spread a little more jam in the holes and dust it all with powdered sugar. Then you can surround your torte with fresh raspberries which does present a nice look.
  15. You can also make mini-cupcake like Linzer Tortes. I use the mini-cupcake paper liners which I brush lightly with the Crisco oil and follow the same directions as for a large one. Bake them in a mini-cup cake pan from anywhere from 12 to 15 minutes in a 375F oven. Watch carefully so they won’t get overdone.  Use your middle oven rack.  One recipe will make 36 mini-cupcake-like Linzer Tortes.            


Meringue Kisses—makes about 30

Ingredients:

  • 2 large egg whites @ room temp
  • 2 tsp. fresh lemon juice
  • 2/3 C. granulated white sugar


Directions:

  • Preheat oven to 225F.
  • Line a large baking sheet with parchment paper.
  • In a medium size bowl, with your electric beaters using the whisk attachment beat the egg whites at a medium-low speed until foamy.
  • Add the lemon juice and beat at medium speed until the whites begin to form soft peaks.
  • Add the sugar one third at a time, then increase the speed to high and beat until stiff peaks form.
  • With a spatula and a small butter knife to help slip the mixture off, pick up some of this mixture and drop onto your parchment covered baking sheet. Let your drops go upwards to form the “kiss” mode (like those chocolate ones).  The size can be around 2” circumference rounds. You should be able to place all of the kisses on a 17” X 12” pan.  Also, you can place around 4 or 5 across—they don’t spread much.
  • If you wish you can sprinkle sifted good chocolate unsweetened cocoa and a dusting of fun colorful cake décor sprinkles. (see picture)
  • Bake for about 60 to 70 minutes until they are firm to the touch and seem thoroughly dry.
  • Store the “kisses” in an airtight container for up to 2 months.


Page 3/3


Peppered Corn Bread Muffins (or Skillet Cake)

Standard

Peppered Corn Muffins

Peppered Corn Bread Muffins

Makes 21 three inch muffins

 I wish that I could lay a claim to this really excellent and easy recipe—but sadly, I can’t.  I found it on the internet—as a skillet cake—and turned it into muffins for a breakfast catering job I had.  They are really good and very hard to quit at just one.  Honey is nice for an accompaniment however, plain is good as well.  They are easy to make and I used paper cups which worked just fine.

Ingredients:

  1. Oil or spray oil
  2. 2 C.  medium stone-ground cornmeal
  3. 1/2 C. flour
  4. 1 Tblsp. sugar
  5. 1 Tsp. baking powder
  6. 1 Tsp. baking soda
  7. 1 Tsp. salt
  8. 1 Tsp. freshly ground pepper
  9. 2 large eggs, lightly beaten
  10. 2 cups (real) buttermilk
  11. 1/2 C. sour cream (you can use the fat-free if you wish)
  12. 3 Tblsp. unsalted butter melted

Directions:

  1. Preheat oven to 375
  2. In a bowl, whisk the dry ingredients together.
  3. In another bowl, whisk the wet ingredients together.
  4. Blend the wet ingredients in the dry ones until blended leaving some lumps.
  5. Pour into 3-inch paper cup lined muffin tins and bake at 375 for 18-20 minutes—or till slightly browned on top and a toothpick inserted in the middle will come out fairly clean.
  6. Let rest for 20 minutes or so.
  7. Skillet Baked Option: Rub or spray a 10” an oven proof skillet with oil and heat it in the oven. Pour the batter in the skillet and bake the bread for 35 minutes—until risen, golden on the top and when a toothpick in inserted in the middle it’ll come out with a few moist crumbs.  Let cool for 20 minutes and serve in wedges.  Don’t forget to decorate the handle with a tied napkin.  Looks can be everything.

Poached Pears Two Different Ways

Standard

poached pears #1 close up

poached pears in the skillet

poached pears in bowl

Poached Pears – Two Different Ways

Serving size depends on the amount of pears you use

(Half to one pear per person is just about right.whole poached pears in skillet whole poached pears

Atkinsons’ had 3 pound bags of Washington state organic golden russet Bosc pears for right under $2.00 so I bought several bags of them.  They were really good but I was also preparing for a little catering gig so I had them in mind for the fruit side of breakfast.  I decided to make poached pears which, if not overcooked, can really be good.  These are the recipes I use for the poaching of a pear.

Ingredients:

  1. 6 large pears—pared, quartered and cored.
  2. 2 sticks of cinnamon
  3. 1/2 Tsp. or more if you wish Fennel Seeds
  4. 1/2 a lemon sliced rather thickly
  5. 1/2 C. to 1 C. sugar
  6. 1/8 Tsp. salt
  7. 2 Cups Water
  8. Optional: 1/4 C. to 1/2 C. Toasted Pumpkin Seeds; Yogurt or Crème Fraiche; Plumped Currants.

Directions:

  1. In a wide deep skillet boil 2 cups of water with the sugar, salt, cinnamon and lemon for 3 minutes.
  2. Turn the heat down and place your pears in the boiling syrup.
  3. Over low heat cook the fruit until just fork tender. Depending on the pear size and quality, that could be anywhere from 10 to 15 minutes. Be careful not to overcook because when you take the pears out with a slotted spoon, they’ll still cook a bit.
  4. Let cool and serve mixed with the toasted pumpkin seeds which always should be placed on right before serving.  You can also refrigerate the whole mixture and serve the pears later.  They’ll marinate in the syrup and be delicious.
  5. Finally, if you wish, you can also add some plumped currants or dark raisins to the whole mixture after the pears have been cooked.  I prefer the sassiness of the currants.

Another slight variation of this recipe is the following:

  1. Peel the 6 pears, leave the stems on and gently scoop out the blossom end (I use the rounded end of the peeler but you can use a melon ball scooper as well).
  2. In a large sized pot, bring to a boil 1 ½ C. of red wine, 1 ½ C. water and 3/4 C. sugar to a boil.
  3. Place in the pot the pears, 1 whole lemon sliced, and 1 cinnamon stick.
  4. Simmer covered for 20 to 30 minutes until the pears are nice and tender but certainly not falling apart! Remember, they will keep cooking a bit when you take them out.
  5. When pears are tender, with a slotted spoon, put them aside in a bowl.
  6. Keep on cooking the sauce without a cover over medium-high heat until the sauce reaches 1/2 of what it originally was and is thick and syrupy.
  7. Strain and pour over pears;  or if you wish, pour, the whole mixture with the lemon slices and cinnamon stick over the pears; refrigerate overnight.  Once again add plumped raisins or currents if you wish.
  8. Serve the next day with a bit of syrup over each pear.

Manchego Cheese wedges or crème fraiche  go very nicely with either one of these delectable desert dishes.

For easy access and printing of this and past recipes, visit Margot’s blog http://blog.tempinnkeeper.com  Call Margot for personal cooking help or hosting

 @ 721-3551.

Margot is a self-taught enthusiastic & passionate cook. Having been an inn-keeper for 5 years at her own inn, she accumulated a lot of good recipes which she loves to share.


Menu for a Realtors’ Breakfast for 20 –1.13

Standard


Menu For a Sotheby’s Breakfast for 20 at 350 Big Wood Dr., Ketchum

January 22, 2013

Thank You Sue Engelmann


Mexican Egg Casserole


Peppered Corn Bread Muffins


Oven Baked Cinnamon/Sugar Corn Tortilla Strips


Poached Pears with Cinnamon and Fennel


                                               Catered by Margot Van Horn

“From My Table to Yours”

Offering Special B&B Styled Menus

From Sue via email

“Hi Margot, Thanks again for doing such a great job on Tuesday!”

Chicken and Cabbage Soup to cure the bbbbrrrrs

Standard

chicken cabbage soup 2The Creative Cooking Edge on A Very Cold Day

Chicken and Cabbage Soup (to cure the bbbbbbbrrrrrrs)

Serves as many as you wish

OK—enough I say.  It’s 2:37 pm on a Monday afternoon, January 14th to be exact, and it’s only 6 degrees.  Actually my outdoor thermometer had been registering the below -0- F mark most all day and in keeping with that thought, my refrigerator was sort of empty and extra cold as well. In it I had 6 partially still frozen chicken legs, a head of green cabbage, some celery, and 2 carrots. Oh my-not very appetizing.  On the counter top, I had one onion and one head of garlic.  Yes indeed like Mother Hubbard, my cupboards were bare.  I was up for the challenge mainly because I didn’t feel like braving the cold outdoors; I was shivering, even indoors; so what to make to warm myself with my few at home ingredients?: soup of course—including the special ingredients that  I do keep in my freezer such as a stash of herbs as well as cilantro and parsley.  So, I used those, but if I hadn’t them, I would have used my dried variety(substitution mix is usually 1 Tblsp. of fresh equating to 1 Tsp. dried). This clear and delicate tasting soup actually turned out so nice that I wanted to share it and my lovely creative experience with you.

Ingredients:

  1. Chicken parts- 6 legs or what ever else your heart desires
  2. 1 small green cabbage cut into 6 (more or less) wedges
  3. 1 onion- cut as above for the cabbage
  4. 4 or 5 stalks of celery—cut into 4 inch pieces- leaves included up to you
  5. 2 carrots—peeled and also cut into 4 inch pieces
  6. Bacon-I chopped the ends of some whole bacon that I had frozen
  7. Parsley—5 sprigs—once again from my frozen stash
  8. Thyme- 3 sprigs- once again from my frozen stash
  9. Basel Leaves-chopped-from my frozen stash
  10. Whole Star Anise- 1/2 of one
  11.  Whole Cloves-3 or 4
  12.   Bay Leaf—1
  13.   Pepper Corns- 4
  14.  Salt—1/2 Tsp.  and more if you wish
  15. Potatoes (peeled if need be and cut into smaller chunks) optional

Instructions:

  1. In a tallish pot, place enough water to cover the chicken and veggies-that’ll probably be a couple of quarts or more.  Bring water to boil.
  2. Throw everything in that water except for the green cabbage and potatoes.
  3. Bring back to a boil and then turn to simmer.  Simmer for half hour.
  4. Add the cabbage and the optional potatoes and bring back to a simmer for another half hour.

I didn’t feel like potatoes, so I made myself some noodles. Boy my soup warmed me up immediately. Additionally, I enjoyed the light and fresh taste of the seasonings that I had randomly chosen for the broth. Finally, the challenge of using the few ingredients that I had in my space kept me on my toes on a freezing cold day and gave me a creative challenge and an ending satisfaction.  So, that’s what I really wanted to share with you because you too can do this or maybe something even better.  If so, email the Sun with your unplanned and sudden creative dish. Don’t be shy!!!