Tag Archives: veggie

Roast Pork Shoulder with a Caribbean Fling with a Side of Braised Celery and Julienned Carrots Also With a Caribbean Fling

Standard

celery carrots caribbeancaribbean on plate caribben pork in dish

Roast Pork Shoulder with a Caribbean Fling with a Side of Braised Celery and Julienned Carrots Also With a Caribbean Fling

 Serves 4 to 6

Cross country skiing here in Blaine County ID has been so marvelous this December.  Now that I am a Courtesy Patrol Person for the Blaine County Recreation Area, it’s even better because I get to meet all sorts of wonderful people.   However, I must say that I do come home hungry; so tonight, I made myself the most marvelous dinner and one that I want to share with you all.  I started the process this morning before I left for the trails and when I came home—it was a breeze to just stick in the oven and enjoy when done.

I also had some left over celery and one carrot which got me thinking about a nice veggie side dish.  A baked potato to add and that was all that I needed.  Perhaps a sweet potato or yam might have been more perfect—but I didn’t have that and I do enjoy baked potatoes.caribbean on plate

Roast Pork Shoulder Caribbean Style

Ingredients:

  1.  2 ½ lb. to 5 lb. bone-in pork shoulder
  2. 1 medium onion, thickly slices
  3. 1 head of garlic, peeled
  4. 2 Tblsp. oregano
  5. 2 Tsp. cumin seeds
  6. 1 Tsp. black peppercorns
  7. 2 bay leaves
  8. 1 Tblsp. olive oil
  9. 1 orange—rind sliced off and chopped small; orange juiced
  10. 1 ruby grapefruit-rind sliced off and chopped small; grapefruit juiced
  11. 1/4 C. lemon Juice

Directions:

  1. Make several sharp cuts in the pork—all over.
  2. Pam spray a large round Pyrex bowl and place onions on bottom.  Then place pork on top.
  3. In a food processor, put the rest of the ingredients.  (The orange, grapefruit and lemon juice should add up to 1/2 cup total of juice.)  Process to make a nice marinade. Use only 1/2 of it for a 2 ½ lb. roast and save the rest for another roast, pork chops, etc.  Best of all, even if your roast is 5 lbs., save 2 tsp. of it for the veggies mentioned here.
  4. Rub the pork, all over, with the marinade making sure that it gets into your multiple cuts.
  5. Cover with wrap and place in refrigerator for at least 4 hours.
  6. Now’s the time to go cross country skiing (or whatever).
  7. When you are ready to cook this roast, preheat over to 450. If  you haven’t had time to remove the roast to get it to room temp, cook it at the 450 stage 5 minutes longer.  If it is at room temp  place the pork in the middle rack of the oven for 30 minutes.  After the initial 30 or 35 minutes, turn down the temperature to 325 degrees and cook 30 minutes per pound total—until the internal temperature of the roast reaches 160.
  8. Remove roast from oven; allow roast to rest for 15 minutes before carving and discard onions.

celery carrots caribbean (2)

Braised Celery and Julienned Carrots Caribbean Style

Ingredients:

  1. 5 to 10 leafless stalks of celery—cut into small pieces
  2. 1 to 2 carrots–julienned
  3. 1-2 Tblsp. butter
  4. 1-2 Tblsp. olive oil
  5. 1-2 Tblsp. flour
  6. 1- 1 ½  C. chicken stock
  7. 1-2 Tsp. of the marinade used above
  8. Dash of soy sauce
  9. 1/4 to 1/2 C. slivered almonds which you have lightly browned in 1-2 Tblsp. butter.

Directions:

  1. In a deep wok like pan melt and heat the butter and olive oil
  2. Cook and stir the celery and carrots stirring for about 2 minutes.
  3. Season with S&P and sprinkle with flour.  Cook, stirring for about 2 more minutes.
  4. Add the stock, marinade and soy sauce, stir, bring to a boil then turn the heat to low. Cover and cook until the celery is tender but still a bit crunchy (about 10- 15 minutes).
  5. Uncover and if you think that you have too much liquid, boil off some of the liquid.
  6. When the mixture has a saucy garnish, add the almonds.  Perfection!!!

Creamy Banana Squash or Winter Squash Soup

Standard

Creamy Squash Soup

Creamy Banana Squash or Winter Squash Soup

Serves 2 generous and 4 scant servings

Here you are using a true “New World” crop. Banana squash seeds were discovered from an archeological site in Peru.  In 1893 R.H. Shumway of the seed catalogue fame introduced this squash to us here in this country.  This squash requires long periods of warm season weather to reach maturity and often stays on the vine for up to 120 days.  Therefore, it requires over a half-year to cultivate and makes for just one single crop annually.  With that in mind, let’s really give respect to this very healthy and delicious squash.  I really enjoy squashes cooked in all sorts of various ways, however, this easy to make “creamy” soup is one of my favorites.  Even though I do call it creamy, as you may notice there is no fat in it.  There is another variety that does contain cream and butter which is more luxurious; however, frankly, this wintery warm-me-up version fits just right for my belly.  Enjoy!

Ingredients:

  1.  3 C. peeled banana squash- cut into 1 to 2 inch cubes (about 1 ¾ lb.)
  2. 4-5 cloves of garlic, peeled
  3. 1 pippin apple-peeled, cored, and chopped fine
  4. 1/4 tsp. dried tarragon
  5. 2 tbsp. white wine or vermouth
  6. 4 C. chicken stock
  7. 4 to 5 slices of stale French bread torn into small pieces
  8. S&P to taste
  9. Green onion slivers (bulb and top) for a topping
  10. Plain yogurt(non-fat is fine) for topping

Instructions:

  1. Combine the first 6 ingredients in a large pot and place on medium high heat.
  2. Bring to a boil then turn the heat to medium low and cook for about 30 minutes—until pumpkin is very soft.
  3. Add the bread pieces and cook 5 minutes more
  4. Puree the soup in a blender, reheat and add S&P to taste.
  5. Top with a generous dab of yogurt and green onion slivers.

For easy access and printing of this and past recipes, visit Margot’s blog http://blog.tempinnkeeper.com  Call Margot for personal cooking help or hosting

 @ 721-3551.

Margot is a self-taught enthusiastic & passionate cook. Having been an inn-keeper for 5 years at her own inn, she accumulated a lot of good recipes which she loves to share.


Spinach Simmered in Yogurt or Spinach Raita

Standard

Greens Simmered in Yogurt

Spinach Simmered in Yogurt or Spinach Raita

Serves 4 however I can eat almost all of it at one sitting


I loved traveling through India.  It’s such an awesome country in every way and I do love their cuisine. It is, I find, a very healthy one.  So, here is one of my favorite dishes.  It’s so easy to make and delicious to eat.  In fact, you can eat a lot and lot of it and not be worried about gaining any weight.  It’s nutritious and perfect for after the holiday extravaganzas.  I hope you’ll enjoy it as I do.

Ingredients:

  1. 1 lb. spinach well rinsed (6 C. of raw spinach = 1 lb.) and coarsely chopped
  2. 2 Tblsp. vegetable oil or olive oil
  3. 3 minced garlic cloves
  4. 2 small dried red chilies(if I don’t have that, I use chili flakes)
  5. 1 Tsp. ground coriander
  6. 1 Tsp. turmeric
  7. 1 C. plain whole milk yogurt (but I have used non-fat) whisked till smooth
  8. Salt to taste

Directions:

  1. Heat a large skillet over medium high heat and add the spinach. Cook over moderate high heat, stirring, until wilted.
  2. Place the spinach in a colander and press the liquid out of it.
  3. In the same skillet, heat the oil of your choice and add the garlic and chilies.  Cook over moderate heat about 2 minutes. Add the coriander and turmeric. Cook stirring until it hits your nose—about 1- 2 minutes.
  4. Add the spinach and yogurt. Cook over low heat, stirring until the yogurt just begins to separate-about 3 minutes.
  5. Season with salt and serve.  You can serve this over rice or with Nan of course.
  6.  I have made this with a variety of other greens—so don’t be shy about substituting.  Other greens usually take longer to cook though—so make sure to taste.  As well, you can add or substitute various ingredients such as adding grated fresh ginger or some green chopped chilies.

For easy access and printing of this and past recipes, visit Margot’s blog http://blog.tempinnkeeper.com  Call Margot for personal cooking help or hosting

@ 721-3551.

Margot is a self-taught enthusiastic & passionate cook. Having been an inn-keeper for 5 years at her own inn, she accumulated a lot of good recipes which she loves to share.


Creamy Cauliflower (a lovely and healthy mashed potato substitute)

Standard

Creamy Cauliflower (a lovely and healthy mashed potato substitute)creamy cauliflower puree 5

This is a very variable dish and fun to “fool” your guests with—because many of them won’t even note the difference between usual and the different.  Cauliflowers which now can be procured from markets in all different kinds of shades and resembling it’s cousin, broccoli, in form is low in fat, low in carbohydrates but high the good stuff like dietary fiber, folate, water and vitamin C.  You actually can see cauliflower mentioned in the writings of the Arab Muslim scientists in the 12th and 13th century.  For me, I first heard of it when my parents informed me that they picked me as a baby from a cauliflower patch.  Yes, you heard right.  This was a common European/French statement to make to the younglings—when they asked that pertinent question:”Where Did I Come From?” Choux which in French alludes to the cauliflower is still used as an endearing term as in: “Mon petit choux”.  So there you have it—Margot loves cauliflowers because from it she was derived.  No laughing please—this is a serious topic.   To end this little diversion, here is a recipe that I often use and enjoy:

Ingredients:

  1. 1 nice creamy white cauliflower: about 8 C. of bite-size pieces (but if you wish to be inventive another color will do) and save the stem greens if you wish to use in presentation decoration.
  2. 4 cloves garlic, crushed and peeled or minced
  3. 1/2 green cooking apple (I use it unpeeled but do as you wish) such as the wonderful Pippin—diced
  4. 1/3 C. Buttermilk or I use 1/3 C. milk with 1 Tblsp lemon juice which has sat for 5 minutes
  5. 2 Heaping Tblsp Parmesan—1 to be saved as a topping
  6. 2 Tsp. butter-1 tsp to be saved as a topping
  7. 1/2 Tsp. Salt or as much as you wish for taste
  8. Fresh ground pepper for taste

Directions:

  1. Place bite sized cauliflower florets in a microwave safe dish along with the minced garlic and diced apple- and just a bit of water with a cover and microwave on high for about 8 minutes. Steam until very tender.  Then drain well.
  2. At this point, either use a potato smasher to smash everything before putting in a blender to puree; or use your food processor to puree the ingredients.  Before switching your machine switch on, add the milk, 1 heaping Tblsp. Parmesan, 1 Tsp. butter and S&P.
  3. When you have finished the puree, place the ingredients in a broiler proof dish and top with your remaining butter and parmesan.  Place under broiler until nice a brown on top.  (If you have made this dish several hours or more before serving and want to heat it up in the oven before broiling, please do that. Or you can even microwave it till hot and then broil it.)
  4. By the picture, you can see that I surrounded this dish with roasted Brussels sprouts and the very exterior rim is lined with the leaves I had saved from the Cauliflower itself.
  5. Variations include using different kind of cheeses, chopped herbs without the apples; or even nutmeg, cinnamon or currents with the apples; and so once again, it’s your imagination that can rule.  I imagine you could even use rich cream or 1/2 & 1/2 instead of the milk.
  6. In conclusion, this can be a very healthy dish and it’s fun to play around with and with which to surprise you dining guest.
  7. Bon Appetit from Margot, TempInnKeeper.

For easy access and printing of this and past recipes, visit Margot’s blog http://blog.tempinnkeeper.com  Call Margot for personal cooking help @ 721-3551.

Margot is a self-taught enthusiastic & passionate cook. Having been an inn-keeper for 5 years at her own inn, she accumulated a lot of good recipes which she loves to share.

A Quick and Easy Guide to Roasting Veggies

Standard

Roasted Brusels Sprouts 001 roasted brocolli roasted brocolli (4) roast zucchini with toasted sesame seeds 001

A Quick and Easy Guide to the Roasting of Vegetables

  • When flavoring roasted vegetables (particularly after roasting) you want to avoid a heavy dose of liquids because they’ll soften any crisp edges that develop during roasting.
  • Roast in a very hot oven—Anywhere from 425 to 475 degrees is usually perfect. It really depends on your oven and your taste. I don’t mind veggies that are blackened somewhat; maybe for you that’s too much. So, I guess I’d try 450 degrees to start with.
  • Cut your vegetables in even-sized pieces so that they’ll roast evenly. Except for potatoes, you can cut up the veggies the morning of your planning to roast them.
  • To prevent sticking, line a heavy duty high edged pan with parchment paper.
  • Place your vegetables evenly over the whole pan—and in fact near the edges of the pan particularly if your pan is sparsely populated.  Vegetables near the edges tend to brown better.

The Master Recipe Is:

Ingredients:

1 lb. vegetables—well washed and peeled if necessary-cut per directions below

1- 3 Tblsp. olive oil

1/2 Tsp. or more to taste of kosher salt

Freshly ground pepper, to taste

Fresh lemon juice—a couple of squirts (optional and depends on whether you’ll be using one of next

weeks yummy splashes recipes)

       Directions:

  1. Place rack in center of oven and heat to 425-475 degrees.
  2. 2.        Line baking sheet with parchment paper. Wash, air dry and prepare vegetables according to the “quick guide introductory paragraph” at start of this column and the “vegetables to use” guide found below.
  3. 3.        In a bowl toss your vegetables with the “master recipe” ingredients. Do not clean bowl because you’ll be using it again after the veggies are done. 
  4. Place your vegetables evenly spaced on your lined pan-lying–on the cut side if that’s applicable.
  5. Roast according to individual vegetables mentioned below in “vegetables to use guide”.  Watch carefully to see that your veggies don’t brown more than you wish them to—but remember, they shouldn’t be under roasted.
  6. 6.        When the vegetables are done, return them to your original bowl and use the rest of the marinade left or if need be, add more olive oil if they seem a bit dry and season with more S&P and lemon juice if you deem necessary

( OR use another flavoring which will be mentioned in my subsequent column next week).

Vegetables to use guide:

  1. Sweet potatoes: 3-4 servings per lb. Cut into 1-inch pieces. Roast 10 minutes and flip and roast 5 to 10 minutes more.
  2. Cauliflower: 3-4 servings per lb. Cut into 1 to 1 ½ inch florets. Stir every 10 minutes until tender and light brown—20 to 25 minutes total.
  3. Asparagus: 3 -4 lbs. per serving: cut off tough bottom ends. Roast for 5 minutes, flip and roast till tender—5 to 8 minutes
  4. Brussels Sprouts—3-4 servings per lb: half lengthwise; arrange cut side down and roast until tender and brown—about 15 minutes. No need to flip.
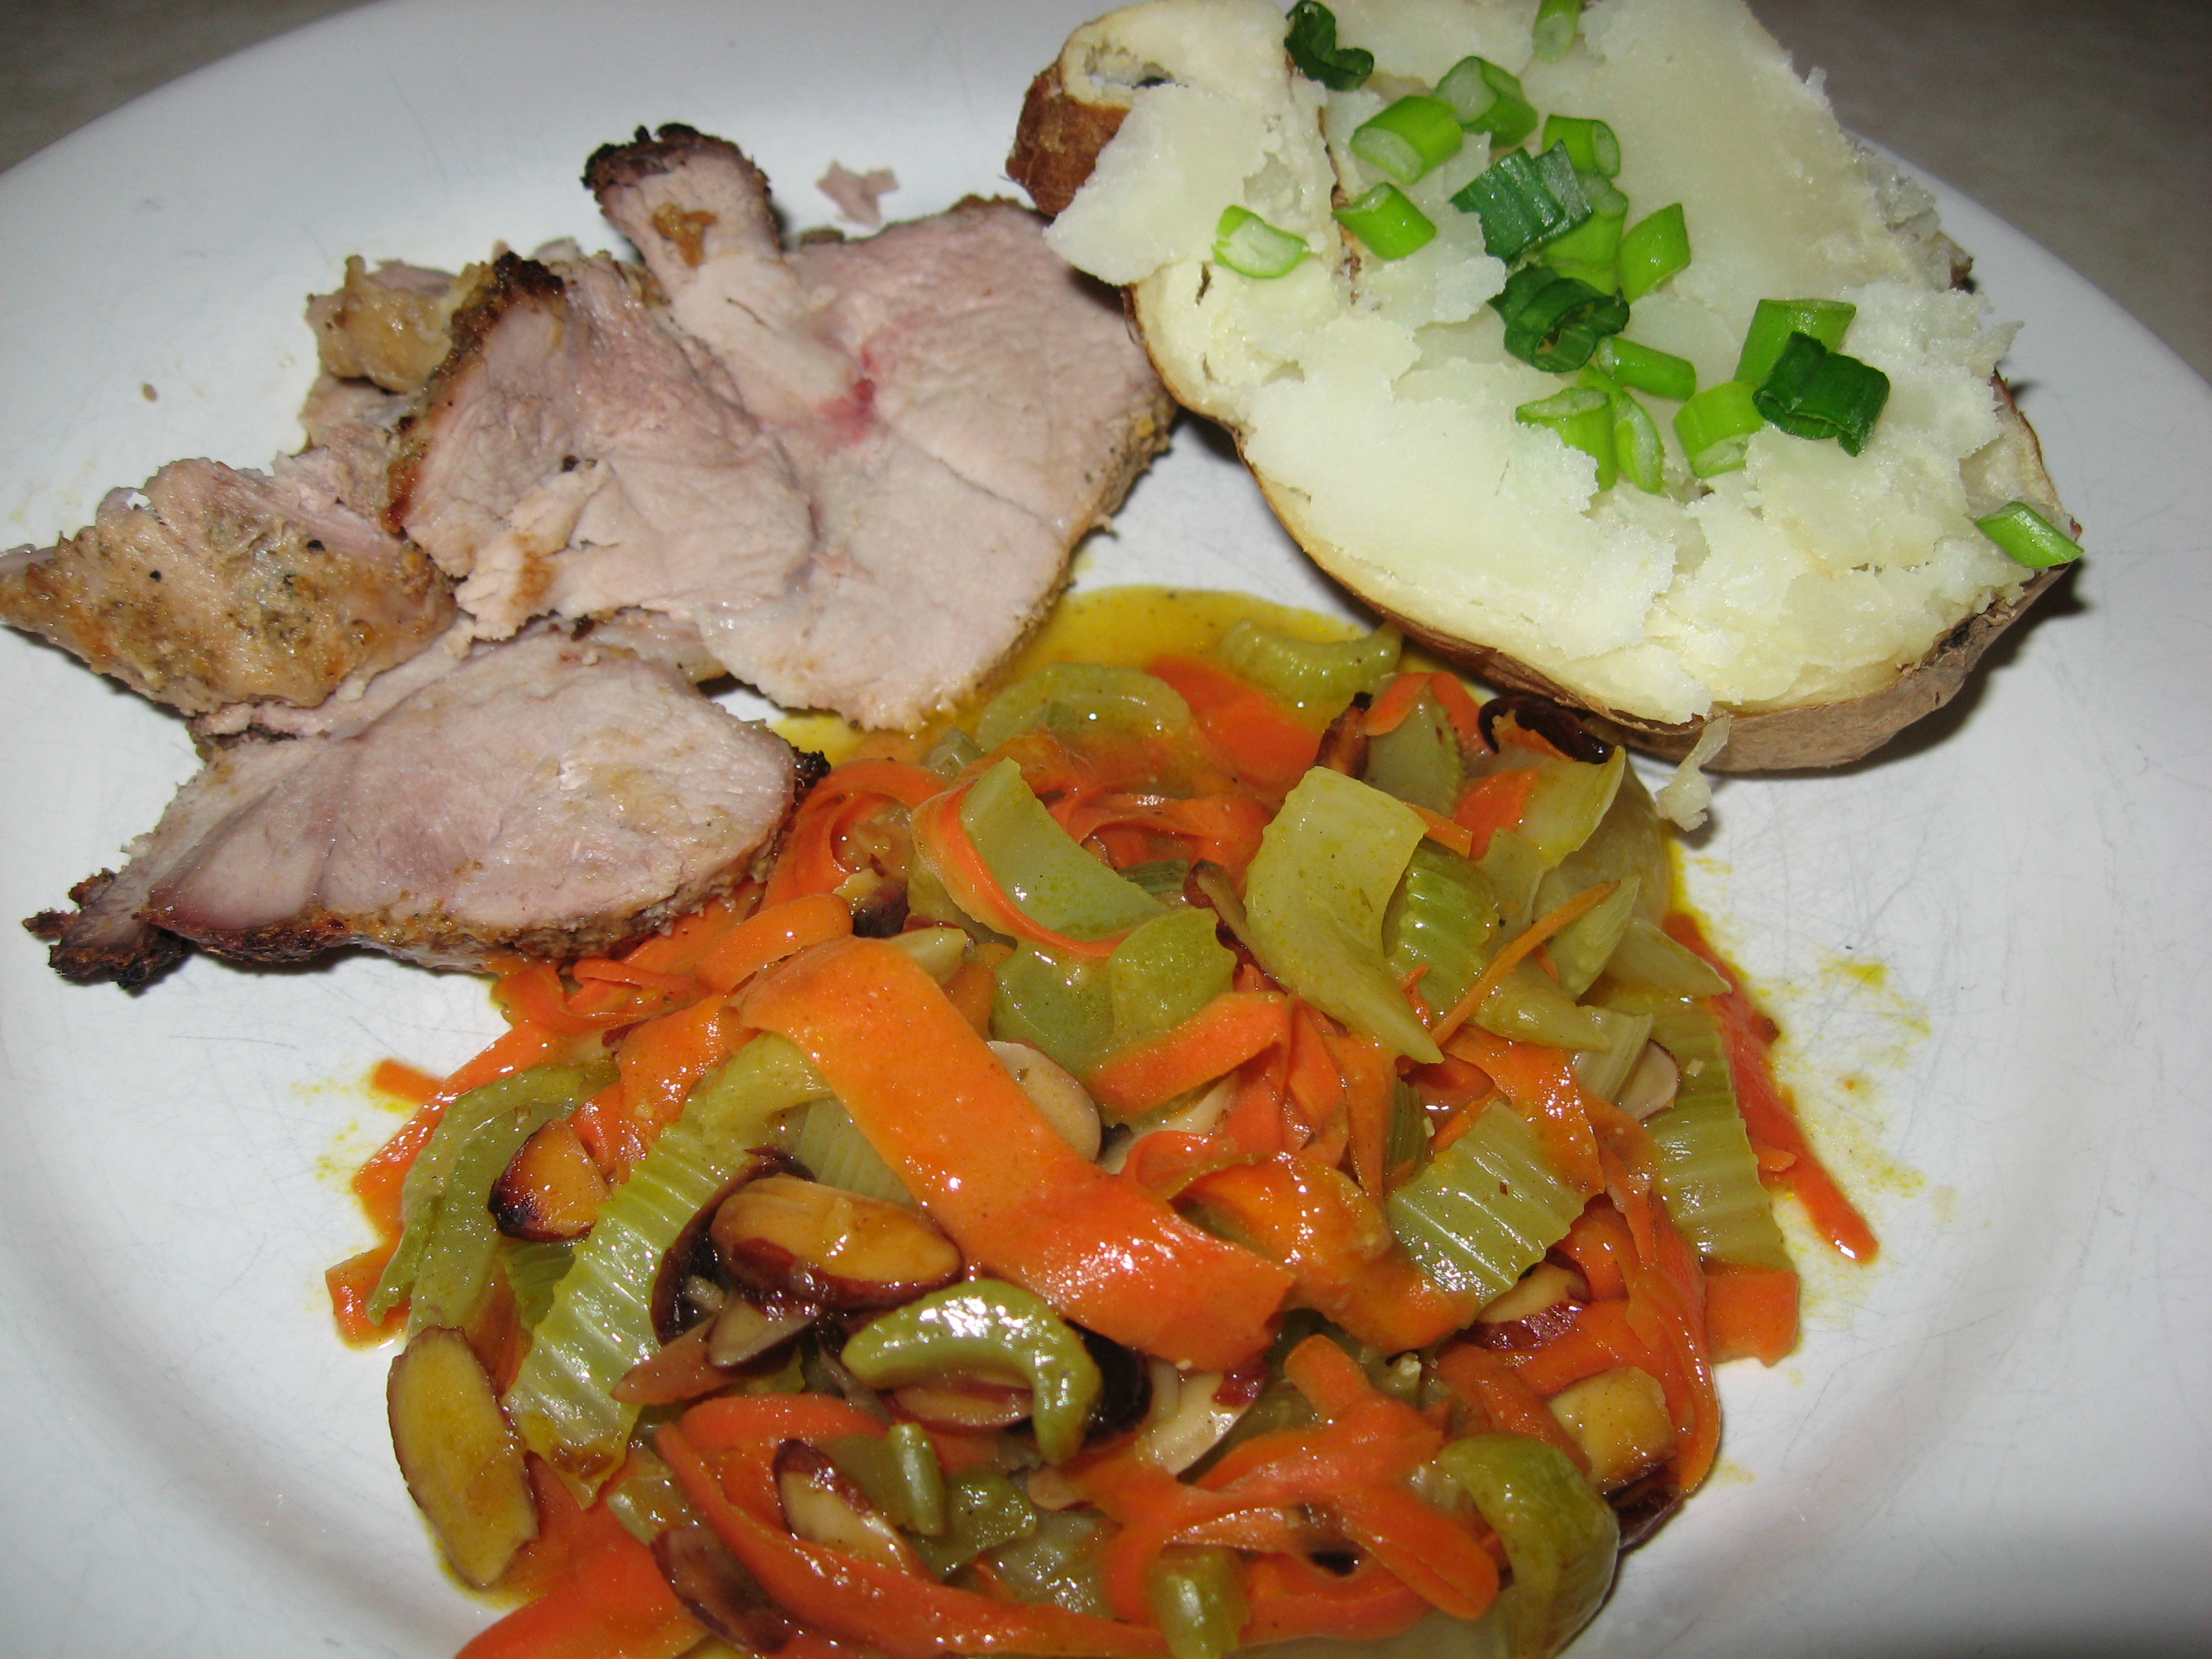
  5. Potatoes (red, yellow, russet) 2 -3 servings per lb. Peel or scrub clean and dry. Cut into 1 inch wedges.  Roast until brown on bottom-10 to 15 minutes. Flip and continue to roast until tender—5 minutes more.
  6. Carrots: 3-4 servings per lb. Peel, if thick cut in half crosswise to separate thick end from thin end; half the thick end length wise. Cut crosswise into 1-inch lengths.  Roast until lightly browned on bottom, 12-15 minutes. Flip and roast until tender—3 to 5 minutes more.  Shriveled can be OK.
  7. Beets: 4 servings per lb. Trim, peel and cut into 3/4-1 inch wedges. Roast 15 minutes, flip and roast until tender-10-15 minutes more.
  8. Parsnips– 2-3 servings per lb. Peel, halve crosswise, halve or quarter thick end lengthwise and cut all crosswise into 2-inch lengths.  Roast until browned on bottom about 10 min. Flip and roast till tender-about 5 minutes more.
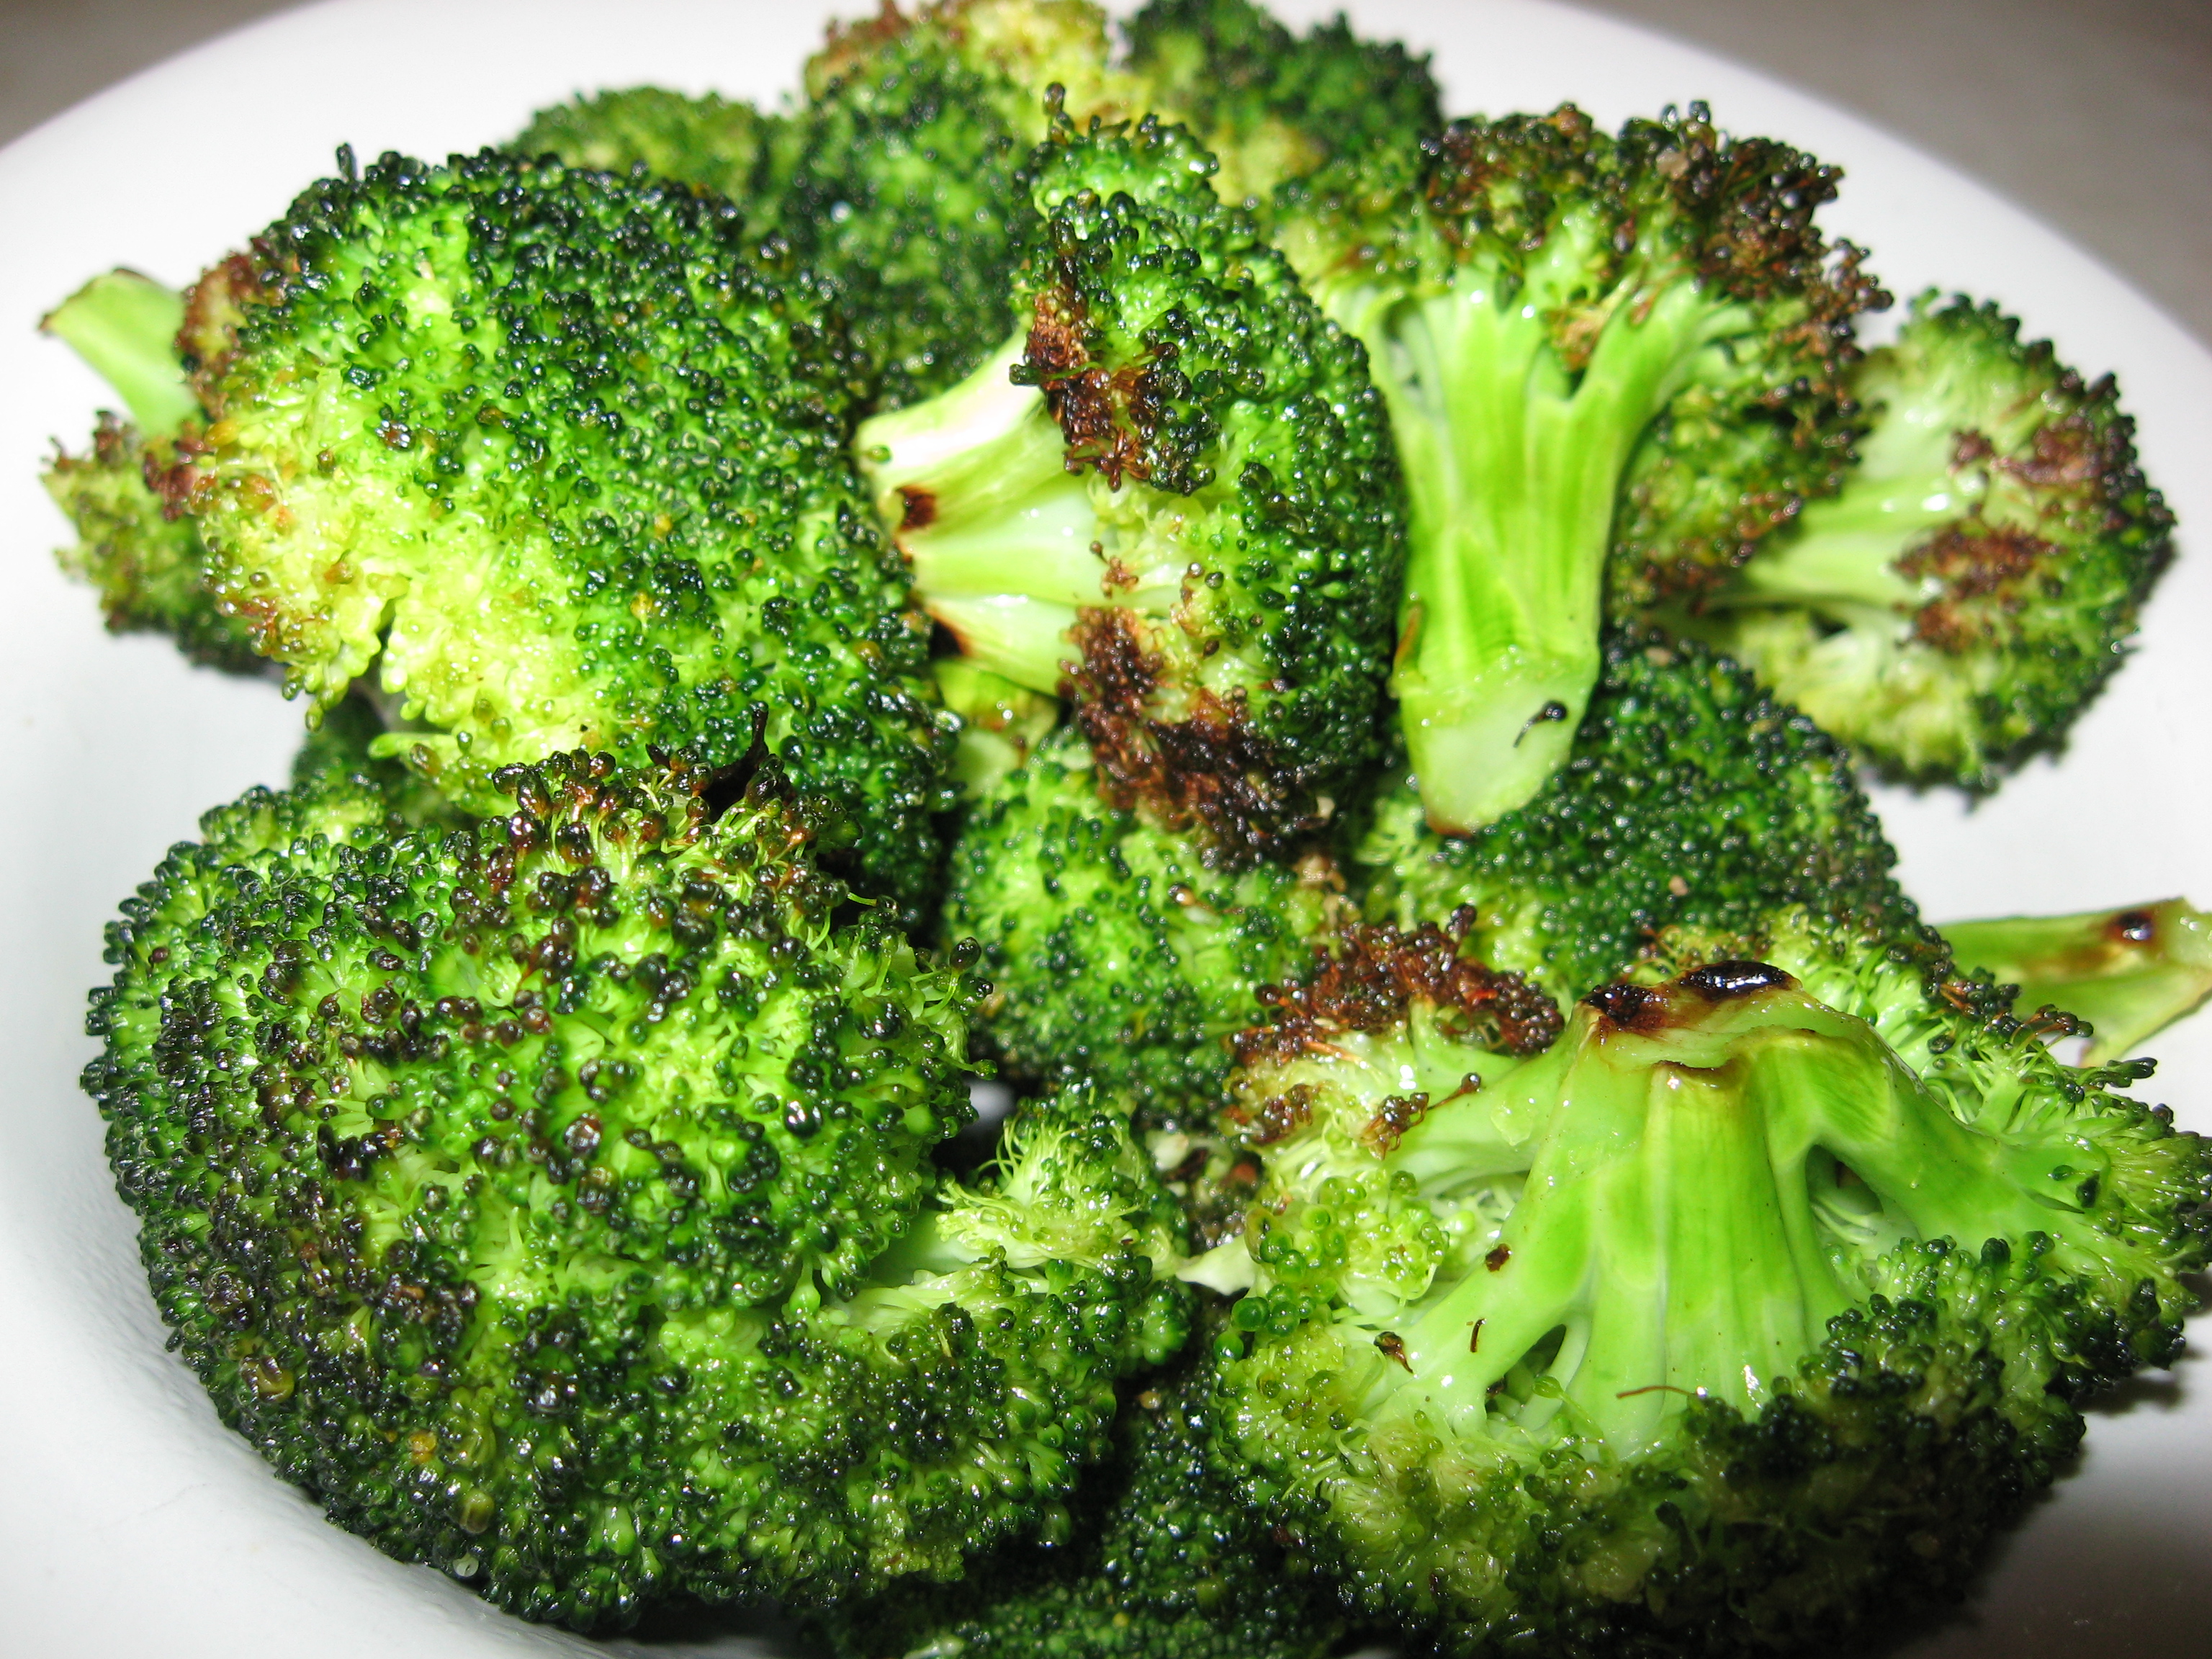
  9. Broccoli Crowns-2-3 servings per lb. Trim, peel the stem; slice it into 1/4 inch thick disks.  Split the florets through the stem so that each piece is 1-1/2 to 2 inches wide.  Roast until the floret tops begin to brown, 8 – 10 minutes. Stir and continue to roast until tender—3 to 6 minutes
  10. Green beans: 4 servings per lb. Trim stem ends. Roast until tender, a bit shriveled, and slightly browned, about 15 minutes. No need to flip.
  11. Butternut squash: 4 serving per pound. Peel and cut into 3/4 to 1 inch pieces.  Roast until browned on bottom-15 minutes. Flip and roast until tender-5 to 10 minutes
  12. Mushrooms: (cremini or small white) 3-4 servings per lb.  Brush clean and trim stems flush with cap. Roast stem side down until brown on bottom 20-25 minutes. Flip and roast until browned on top- 5 to 10 minutes more.
  13. Zucchinis Wash well, cut off ends. Cut lengthwise to create 4 halves and then crosswise in even 1/2 to 3/4 inch chunks. Roast open side down till brown, about 9 minutes. No need to flip.
  14. Roasting a medley: If you insist, because they do cook at different rates, this will be more time consuming and intensive caretaking, so try to roast veggies that have approximately the same cooking times; or cook them all individually and then put them together.
  15. Veggies I have left out because of print space limitations: Fennel (15 min. flip 10 min. more); Turnips (10-15 min., flip, 5 more min.); Rutabaga15 min. flip and 10-15 min. more.

NEXT WEEK—Six Yummy Splashes To Use With Your Roasted Veggies.


For easy access and printing of this and past recipes, visit Margot’s blog http://blog.tempinnkeeper.com  Call Margot for personal cooking help @ 721-3551.

Margot is a self-taught enthusiastic & passionate cook. Having been an inn-keeper for 5 years at her own inn, she accumulated a lot of good recipes which she loves to share.

994 words


Six yummy splashes to use with your roasted veggies (main recipe found in last week’s Sun edition or on Margot’s Blog)


Master Recipe once again is:

         Ingredients:

1 lb. vegetables—well washed and peeled if necessary-cut per directions below

1- 3 Tblsp. olive oil

1/2 Tsp. or more to taste of kosher salt

Freshly ground pepper, to taste

Fresh lemon juice—a couple of squirts (optional and depends on whether you’ll be using one of next

weeks yummy splashes recipes)

The Six Splashes are:


  1. 1.        Rosemary-Lemon Oil

           Ingredients

Zest of 1 large lemon, removed in long strips with a veggie peeler

2 to 3 Tbs. olive oil or more as needed

1 Tsp. chopped fresh rosemary

1 Tsp. chopped fresh thyme.

Directions:

Combine in a small saucepan lemon zest and oil. Cook over medium-low until zest bubbles steadily for about 30 seconds. Remove from heat, let cool about 3 minutes and stir in the herbs.  Let sit for at least 20 minutes. Toss with the vegetables and S&P before roasting. With this splash you don’t need to use the master recipe. Discard lemon zest when veggies are put on baking sheet.  If necessary, add additional oil after veggies have roasted.

Pair with beets, butternut squash, carrots, cauliflower, fennel, mushrooms,zucchini, parsnips, potatoes and sweet potatoes.    


  1. 2.        Moroccan-Spice Rub

    Ingredients

2 Tsp. ground cumin

1 Tsp. ground coriander

1/2 Tsp. chili powder

1/2  tsp. sweet paprika

1/2 Tsp. ground cinnamon

1/4 Tsp. ground allspice

1/4 Tsp. ground ginger

1/4 Tsp. cayenne

Pinch ground cloves

2 to 3 Tblsp. olive oil

Directions:

Mix all of the spices in a small bowl.  Add S&P to taste.  Before adding the

olive oil from the master recipe to the veggies, toss 1 Tsp. of these spices with your veggies.

After veggies are done, douse them with this rub and if you wish, more olive oil as well.  .

Pair with butternut squash, carrots, cauliflower, parsnips, potatoes, sweet potatoes.

                     potatoes and turnips.   

  1. 3.        Sesame Salt (gomasio)

    Ingredients

2 Tblsp. sesame seeds

1/2 Tsp. sea salt

1-3 Tblsp. olive oil

Directions:

In a small dry skillet, toast the sesame seeds over medium heat, stirring continually until light

golden-brown, 3-5 minutes. Add the salt, cook stirring, for about 30 seconds.  Transfer to a

bowl and let cool thoroughly. Pulse the seeds in a clean spice grinder till coarsely ground

you should still see some whole seeds in the mixture. Roast your veggies using the master recipe.

Toss about 2 tsp. sesame salt with your batch of veggies after roasting . If you feel the veggies

are too dry, add some more olive oil. I have also not ground the seeds and just used them

roasted which seems to be very tasty as well. I really use this easy splash a lot.

                    Pairs with: asparagus, broccoli, Brussels sprouts, green beans, zucchini, parsnips, sweet

                    potatoes and turnips.


  1. 4.        Caramelized Shallot Butter

           Ingredients

3 1/2 sweet butter, softened

1 large shallot, finely diced (1/3 cup)

1/2 Tsp. chopped fresh thyme

1/2 Tsp. finely grated lemon zest

S&P

Directions

Heat butter in small saucepan over medium-low heat until melted. Add shallot and cook,

stirring frequently, until deeply browned, 8 to 10 minutes. Remove from heat and stir in

thyme.  Cool completely.

In a small bowl, combine the shallot mixture with the remaining 2 1/2 Tbsp. butter and

The lemon zest.  Stir to blend well. Season to taste with S&P.

Scrape the butter onto a small piece of saran wrap, mold into a log shape and wrap in the

plastic.  Refrigerate until ready to use. Roast your veggies using the master recipe. When done,

toss about 1/3 of the butter (generous tablespoons)  with  the veggies.

         Pairs with: asparagus, Brussels sprouts, butternut squash, carrots, fennel, green beans,

         mushroom, parsnips, potatoes, and sweet potatoes.


  1. 5.        Ginger-Lemon-Soy Splash

                             Ingredients

1-inch piece fresh ginger

1 Tsp. fresh lemon juice

1/2 Tsp. soy Sauce

Directions:

                             Set a small strainer in a bowl. Peel and finely grate the ginger. Put the grated ginger in

the strainer and extract the juice by pressing it in the sieve with a small spoon.  Transfer

1/2 Tsp.  ginger juice to another small bowl. (Discard the rest or save for another use.)

Stir in the lemon   juice and soy sauce. Roast the veggies using the master recipe. After roasting them,

toss them with this splash.

 Pairs with: beets, broccoli, carrots, cauliflower, and mushrooms


  1. 6.        Toasted Garlic and Coriander Oil 

    Ingredients

           1 1/2 Tblsp. Olive Oil

1 Tblsp. finely chopped garlic (2 cloves)

2 Tsp. ground coriander

1 Tsp. fresh lemon juice

S&P

          Directions

In a small saucepan, combine the oil and garlic.  Set over medium-low hear and cook until

the smaller pieces of garlic turn light golden-brown, about 3 minutes.  Stir in the coriander

and cook for about 20 seconds.  Immediately remove from the heat and transfer to a small

heatproof bowl to prevent overcooking.  Keep warm. Arrange your veggies that have been

roasted using the master recipe on a serving platter and spoon the toasted garlic oil over

them.

         Pairs well with: asparagus, zucchini,  beets, broccoli, cauliflower, fennel, green beans,

         Mushrooms and turnips.


For easy access and printing of this and past recipes, visit Margot’s blog http://blog.tempinnkeeper.com  Call Margot for personal cooking help @ 721-3551.

Margot is a self-taught enthusiastic & passionate cook. Having been an inn-keeper for 5 years at her own inn, she accumulated a lot of good recipes which she loves to share.

902 words

Roasted Corn with Basil/Shallot Vinaigrette

Standard

Roasted Corn with Basil/Shallot Vinaigrette


Our yummy Hagerman corn is still plentiful so here’s another wonderful and easy fresh corn recipe that I think you’ll all enjoy.


Ingredients:

3 C. fresh corn kernels—about 3 ears

2 Tblsp. olive oil

1/4 C. chopped fresh basil

1 Tblsp. minced shallot

1 Tblsp. red wine vinegar

1/4 Tsp. salt

Pepper to taste


Instructions:

Heat oven to 450

Toss corn and oil together so the corn is well coated and spread on a baking sheet lined with parchment paper.

Bake stirring once 1/2 way through for about 20 minutes

Combine basil, shallot, vinegar, S&P in a bowl and add corn kernels.

Serve warm or cold.

This can be made one day ahead.


PS—One of my favorite ways of cooking our wonderful corn is in the micro.  First I slightly cut the soft end just a bit and then I soak the ears in cold water for 1/2 hour.  Then I wrap them in a damp paper towel and place them in the micro—2 minutes per ear so if only 1 ear, 2 minutes; 2 ears = 4 minutes; etc.  I take them out carefully, take the husk off and voila, crunchy crisp corn for your delight.  If it’s too crunchy for only 2 minutes, cook a bit more.


For easy access and printing of this and past recipes, visit Margot’s blog http://blog.tempinnkeeper.com  Call Margot for personal cooking help @ 721-3551.

Margot is a self-taught enthusiastic & passionate cook. Having been an inn-keeper for 5 years at her own inn, she accumulated a lot of good recipes which she loves to share.


Lentils and Kale Delight-Think Single

Standard

Lentils & Kale Delight—Think Single

Servings: for one or possibly two people


I am a single person with a wonderful toy poodle and a lovely Green Singing Finch. Most of my days, I eat my main meal in the middle of the day (following my Swiss heritage I guess) and a little something more in the evenings.  This is a wonderfully EASY, quick, tasty, and healthy dish to make for your evening meal (or any time of the day for that matter)

Ingredients:

1/2 C. lentils (the packaged brown kind)

1 or 2 chopped garlic (I actually use the jar kind)

1/3 C. chopped red onion

4 or 5 sprigs of whole parsley

1 or 2 sprigs of fresh thyme

3 or more mint leaves (chopped)

1/2 Tblsp. cumin seeds

2 C. chicken broth

1 C. or more of chopped fresh kale

Shaved Parmesan cheese for topping

Additional ingredients you can add are:

One diced boiling potato to make a perfect protein with the lentils (you might want to add a bit more liquid if so).

For the naughty at heart, a bit of diced bacon from the start.

In a good sized pot, place the above mentioned ingredients and bring to a nice simmer. Place a lid on top but tilt it—and simmer for anywhere from 20 to 25 minutes depending how tender you wish the lentils and kale to be.  You can adjust the herbs to your taste. I felt that I didn’t need to add S&P—but do whatever inspires you.  That’s what cooking is all about—a little experimenting and lot of enjoying.  Use a lot of the right side of your brain when it comes to cooking.  It should be creative and fun.

Place in a beautiful soup bowl and top with freshly shaved Parmesan.

By the time I have cooked this, my toy poodle is hungry for his meal. So of course, I give him a bit of chicken stock and parmesan, all of which he loves and well appreciates. Then for Bandit, the bird, he gets some fresh kale.

For easy access and printing of this and past recipes, visit Margot’s blog http://blog.innkeeper.com  Call Margot for personal cooking help @ 721-3551.

Margot is a self-taught enthusiastic & passionate cook. Having been an inn-keeper for 5 years at her own inn, she accumulated a lot of good recipes which she loves to share.


Skillet-Baked Eggs with Mushrooms and Spinach

Standard

This is especially for Steve Neal, a VSI guest from 2005,  who asked in a recent email:

“I do remember a spinach and egg breakfast you made on Sat. or Sun. morning but do not remember how you did it. I know you cooked the spinach some how and poached the eggs on top I believe it was delicious. I wish I remembered how you did it. ”

Thank you for remembering and asking Steve.  Memories are precious and you have made my day!!!  Here  is the recipe:

Skillet-Baked Eggs with Mushrooms and Spinach

 I so admire something that has had a long history of use and has pretty much stayed the way it always has been, but yet is still used in our modernized world. Cast iron vessels fit that bill. They have been used for cooking for hundred of year’s way before the modern stove was invented.  At that time, they were admired for their durability, their ability to retain heat, and for being a perfect cooking tool to hang over a live fire. In spite of being a bit heavy to handle, they are still wonderful in today’s world to use stove top for searing, frying or cooking stews and such; they also are fabulous to use for baking a dish started on the stove top and finished in the oven; or for baking cakes, cornbread and such. I most of the time serve my skillet dish straight out of it—with a pretty scarf or napkin tied around the handle.

Ingredients:

16 oz. fresh baby spinach or 1 (12 oz.) bag thawed frozen leaf –barely cooked, drained, and pressed/squeezed well to let the entire excess liquid out.

1 onion chopped

1 clove of garlic, chopped fine

6 oz. mixed or same kind mushrooms thinly sliced

2 Tblsp. sweet butter

1/3 C. heavy cream

1/8th tsp. nutmeg

S&P

4 large eggs

2 Tblsp. grated Parmesan cheese

Instructions:

Preheat oven to 450

  1. In a large cast iron or oven safe skillet, heat the butter over medium heat.
  2. Add the onion and cook till translucent (3-5 minutes). Increase the heat to medium nigh and add the mushrooms.  Cook, stirring occasionally until softened and any liquid is released (about 4 minutes).
  3. Add the garlic and cook until fragrant (about 45 to 60 seconds).  Add the cream, nutmeg, and spinach. Season with S&P.
  4. Remove skillet from heat and using the back of a spoon, make 4 “nests” in the mixture.  Break an egg in each indentation. Season the eggs with S&P and sprinkle with cheese.
  5. Bake in preheated oven until the whites are set and the yolks are still runny (about 8 minutes.)
  6. Tie a pretty scarf around the handle and serve out of skillet at your dining room table.

As always, Bon Appetit!!~!!

For Vegetarians here’s a delight–Celery Root Slaw

Standard

celery rootThis delicious, and I mean that very seriously, recipe comes from a dear friend of mine who was born in my hometown of Geneva, Switz.  She’s an amazing person in all respects, but one of them is glorious entertaining with even more glorious foods that she, mostly alone, has prepared to everyone’s delight.  The unusual aspect of this is that Renata is a vegetarian. Most guests, visiting her buffets, don’t even realize that.  They think that, for instance, that this excellent Celery Root Slaw is a pasta dish—I don’t think so.  She loves to share her recipes, as I do, so here it is for your enjoyment.  As well, you can visit her recent business venture: No Harm Done Design which is a small company that makes elegant faux-fur throws.  She and her partner started this business with a young penniless Cambodian woman who has now given a livelihood to many others and supports her whole extended family.  No Harm Done concerns that motto for animals and features a correct work ethic all around.  Please feel free to visit its website: www.noharmdonedesign.com.  Don’t forget to order your favorite throw.  You won’t be sorry.  Of course, I have one as well. 

Celery Root Slaw

Ingredients:

For Slaw:

1 Celery Root the size of a fist

For Sauce:

1 Tblsp. Dijon Mustard

4 to 5 Tblsp. mayo or olive oil mayo

1 clove garlic, finely chopped

S&P to taste

Onion Powder to taste

2 Tsp. Balsamic Vinegar

Half of an 8oz. can chopped pineapple, drained or 1 small shredded apple

Handful of walnut halves

Directions:

For Slaw:

1, Peel just the very rough exterior part of the celery root.  Don’t go overboard because then you won’t have any root left

2. Put in food processor and shred.

3. Set aside.

For Sauce:

1. Mix the next 7 ingredients well. The sauce should not be as thin as regular salad dressing however, if it seems too thick, add a bit more balsamic.

2. Add the sauce and the walnut halves to the slaw and mix well.

This can also be made with raw shredded carrots, shredded ginger &/or shredded apple. Optional and additional to the carrot slaw would be raisins. 


Orange Scented Pork & Veggie Stew

Standard

Orange-Scented Pork and Veggie Stew

Serves 6

The weather report is saying: tomorrow a little snow with rain; the day after a chance of sun, cloudy and partly cloudy and warmer with temps ranging from 30 to 60; the day after that a little snow with a chance of thunder; well you get my drift.  It’s spring and wait one minute because the weather will not be the same as it was the minute before.  Spring is fun and full of surprises. I’ve never down hilled with lightening and thunder looming overhead, however, the other day I thought that might have been a possibility. Anyway, one thing is for sure, here in our gorgeous mountains it’s perfect weather now to enjoy this wonderful stew.  Pork can be a nice surprise for the shopper in these difficult economic times because it’s usually priced very reasonably—depending on the cut of course.  A stew can use many different cuts of meat and in this recipe I actually used the thinner pork loin chops which truly were priced very well.  So, here you go and I hope that you’ll enjoy this as much as I have.

Ingredients:

2 ½ Lbs. boneless pork shoulder cut into 2 inch cubes or I used the thinner pork loin chops (with a bone) cut the meat into cubes and inserted the chop’s bones in the cooking process.  I took the bone out before serving.

S&P

2 Tblsp. Olive Oil (more if needed)

2 Onions Diced or Thin Sliced (I like mine thin sliced)

1 Tblsp. Minced Garlic

2 Cups Italian Style Diced Tomatoes With Juice (if you wish a thicker stew, drain the tomatoes before adding them.)

1 Tblsp. Brown Sugar

Zest of 1 Orange (Removed in a 1 long strip if possible, if not, that’s OK)

3 C. Chicken Broth

1 C. Dry White Wine or Dry Vermouth

4 Carrots–halved lengthwise, then cut in 1” lengths

2 Parsnips- prepared like the carrots

4 Tblsp Chopped Fresh Mint Leaves

Vermicelli, for serving with the Stew—Rice is OK as well

Directions:

1.        Parboil in very little water the carrots and parsnips for 3 minutes.

2.        Season pork with S&P. Place the olive oil in a large pot over medium heat and brown the pork for about 6 minutes.  Remove and set aside.

3.        Reduce the heat to low, adding more oil if needed, and cook the onions and garlic until soft, about 10 minutes, stirring occasionally.

4.        Add the tomatoes, sugar, orange zest, chicken broth, and white wine.  Return pork to the pot and bring to a boil over high heat.  Reduce heat to medium-low and simmer, partially covered for 1 hour. (If you used the thinner pork loin chops, the time may be only 30 to 45 minutes) Stir in carrots and 2 Tblsp.of the mint.  Season with some more S&P if needed. Cook partially covered until the pork is tender, about 15 minutes longer.  Remove and discard orange zest if you wish-however, I think it’s sort of fun to keep it in.

5.        Sprinkle with the remaining 2 tablespoons of mint and serve over the vermicelli or rice.

6.        Since you still have one left over orange this is what I serve the stew with: a fresh lettuce that has thinly sliced raw red onion and cut orange segments in it ;or I thin slice some Brussels sprouts and sauté them gently in a mixture of butter/olive oil and some brown sugar. Right before they are done, I add the cut orange segments.


  Are you a frustrated, overworked or timid cook? Call Margot for help @ 721-3551

& please feel free to email her @ margot6@mindspring.com for comments or ideas

Margot is a self-taught enthusiastic & passionate cook. Having been an inn-keeper for 5 years at her own inn, she accumulated a lot of good recipes which she loves to share.