Tag Archives: breakfast

Apples Sauteed serves up to 4

Standard

Sautéed Apples—serves up to 4

apples-in-sauce just-apples pancake-w-apples-sauce-1

I served this often to my B&B guests and they loved it.  It’s so easy to make and is so much better than store bought syrup to use for pancakes or waffles and you get the apples as well.  But don’t stop there, it’s great over ice cream as well.

Ingredients

  • 1/4 cup (or a bit more if you wish) butter
  • 2-3  large tart apples cored and sliced in large segments
  • 2 teaspoons cornstarch
  • 1/2 to 1 cup hot water
  • 1/4 -1/2 cup brown sugar
  • 1/2 teaspoon ground cinnamon or another flavor if you wish
  • Raisins (optional)

Directions

  • In a large skillet or saucepan, melt butter over medium heat; add apples. Cook, stirring constantly, until apples are almost tender, about 6 to 7 minutes.
  • Dissolve the cornstarch, brown sugar and cinnamon In hot water in a microwaveable dish. Place in micro for 1 or more minutes.
  • When apples are just about tender, pour heated liquid into the pan along with the optional raisins if you wish and cook for 2 more minutes.
  • Hints: I started out with the lesser amounts of the hot water and brown sugar. After micro-heating and placing in pan with apples, you can always add more hot water.  If you wish to have more sugar, dissolve the sugar first in hot water and then add to pan.  But truthfully, I found that 1/4 C. brown sugar was plenty sweet enough.


Bon Appetit

Margot Van Horn

Blog: http://blog.tempinnkeeper.com


Crepes, The Easy & Painless Way

Standard

# 1 crepes to eat

Crepes, The Easy and Painless Way

No measuring is daring and it can be fun. It’s certainly the quick way to cook and you might be surprised at how well you can do this.

Crepes are a good substitute for morning pancakes and they certainly are good for lunch, dinner or dessert. They are so versatile. So, it’s up to you with what you want to fill or top them: ricotta cheese and berries? Jam? Veggies and cheese? Chicken bits with a lovely sauce over it all? Or topped with a delicate orange or lemon Crepe Suzette sauce? Variations are endless and fun to invent. You can even have an array of fillings on the side and let guests or your family invent themselves. What I myself had this morning were crepes filled and topped with ricotta and fresh berries. Yum, they were delicious!

I could go on and on about fillings and toppings but what I am giving you here is just the basic crepe recipe. The trick with this recipe is to use the SAME SIZED cup or glass for placing the eggs, flour, milk and butter because you are going to eyeball your amounts within these four vessels. A vessel that holds about 2 cups (oops—I shouldn’t have said that—sorry) will make enough crepes for 4. My picture showing my vessels with the ingredients are for half of the listed ingredients i.e. 1/2 a vessel of eggs, 1/2 vessel flour, slightly less than 1 vessel full of milk & 1/8th vessel of melted butter.

I use a Teflon crepe pan but if you don’t have one, then make sure to put a little oil or butter in your pan first. I like to make sure my pan is quite hot (when an entered droplet of water sizzles). If your first crepe doesn’t turn out quite right, fear not because you’ll know whether to turn the heat up or down to make the next one right.

To keep your crepes warm, you can have a double boiler top all ready to put them in; or wrap them in foil or in a dish covered with foil in a 200F or 250F oven. I also have had left over batter which when whisked again make fine crepes the next day. You also can freeze left-over already made crepes. So see how versatile these guys are?

#2 cups full bowl whisk yes

Ingredients:

  • Eggs-1 vessel full
  • All-purpose flour-1 vessel full
  • Whole milk-1 ¾ vessel full
  • Melted unsalted butter-1/4 vessel full
  • Pinch salt
  • Pinch baking powder (optional)
  • Pinch powder sugar (optional
  • Drop or so vanilla (optional)
  • Lemon or orange zest (optional)

Instructions:     #3 crepe in pan

  • In a bowl that has a pouring spout is the best, whisk well or beat with electric beaters the eggs.
  • Add the remainder of the ingredients. Whisk or beat till you have a smooth batter.
  • Heat your crepe pan or a small size skillet. Add a bit of the batter, just enough to partially cover the bottom because then you want to roll your pan around so the batter slides smoothly over the whole pan bottom. You don’t want a thick crepe. You want a crepe that is fairly thin.
  • Cook until the edges begin to brown—anywhere from 30 seconds to 1 minute. Flip over with a spatula and cook for another 30 seconds or more. You can peek to say how brown the bottom of the crepe is getting.
  • Pile them up on your oven warmed platter and cover; or place in the top of your double boiler that is warm by boiling some water in the bottom part.


Bon Appétit —-From Margot’s Table to Yours

 Want some more recipes or small group catering: visit http://blog.tempinnkeeper.com or email Margot at margot@eyeonsunvalley.com


Roasted Cheese Ratatouille-Versatile, (veggie only or with meat/egg)

Standard

ratatouille casseroleratatouille w.egg


Roasted Ratatouille with Cheese and if you wish, eggs and/or meat

Lots of options here and all quite healthy

Serves 4

Ingredients:

  1. 1 small eggplant cut into 1/2 inch pieces. I left the skin on but if you wish, you can peel it. Also I salted it in a colander and let it sit for at least 30 minutes. After I rinsed it.
  2. 1 medium yellow onion, cut into 1/2 inch pieces
  3. 1 small zucchini, cut into 1/2 inch pieces
  4. 2-3 garlic cloves, minced
  5. 4 or 5 large mushrooms, sliced.
  6. 1-2 Tblsp. olive oil
  7. 1/4 Tsp. (or more if you wish a more exotic taste) of each of the following: cinnamon & nutmeg and S&P to taste
  8. 1-28 oz. canned chopped tomatoes with juice or whole can tomatoes (w/juice) that you’ve chopped
  9. 2-3 Tblsp. torn fresh basil leaves
  10. 1 Tblsp. finely chopped fresh parsley
  11. Half lb. lamb shoulder which you have ground (minus the bone of course) in your food processor. This I found is the most economical way of getting ground lamb. However, the butcher may have some as well for the same price and/or he also can grind up the shoulder meat for you. If you wish you can have even have up to 1 lb. or none at all if you want to be vegetarian. You can also substitute ground turkey, chicken or beef but lamb is delicious and more traditional. (optional)
  12. Mozarella, part skim, 4-6 ounces, thinly sliced and cut into 1/4 –inch strips
  13. 4 eggs (optional)
  14. Crusty French Bread with which to serve it or something else similar

Instructions:

  1. Preheat oven to 400F.
  2. In a 9 X 14 inch Pyrex or other oven proof dish place ingredients 1 through 5 and drizzle with the olive oil. Roast until golden brown and tender. (about 45 minutes) About half way through, I stirred the veggies well. In fact, you can stir even more times if you wish.
  3. Brown the optional lamb, etc. in a bit of olive oil in a skillet stove top. Set aside.
  4. When the veggies are roasted, take your dish out and stir in the seasonings in # 7, the tomatoes and their juices in # 8, the basil leaves in #9 and the parsley in #10 and the optional ground meat in #11.
  5. Bake in the 400 F oven with a foil covering for 20 to 30 minutes till hot and bubbling.
  6. Now’s the time to top with the cheese and bake without the foil for another 10 minutes—or at least till the cheese is melted. I actually turned on the broiler for several minutes to get it browned.
  7. Alternative method of serving: If you didn’t add the meat and maybe want to add eggs to this dish, then before you add the cheese, make four indentations in your veggies, break in an egg and layer the cheese over all. Bake uncovered until the eggs are set and the cheese is melted—8-10 minutes.
  8. Another alternative for this dish: If you did use the meat and you’ve layered the cheese, and cooked it that way but still want an egg on top—fry the egg in a separate pan and when you serve the Ratatouille, place the egg on top. Plenty of protein here and it really is good. Remember, you can serve the left over Ratatouille (if you have any) for breakfast topped with an egg.

Ten Wonderful Recipe Ideas for ALLLLL of that Zucchini in Your Yard

Standard

10 ideas for eating all that zucchini in your garden

1 Pasta: Grab yourself one of those veggie spiral cutting gizmos, which let you render produce into pasta-like ribbons. Zucchini does particularly well. Toss the zucchini spirals in a hot skillet with a splash of oil for a minute or two, then dress with sauce and cheese as you would pasta. Or boil up real pasta, then add the zucchini for the last minute. Drain and dress.

2 Dip: Slice a zucchini in half and toss it on a medium hot grill. Cook until lightly browned and tender, then pop it into a food processor. Add tahini, garlic, salt, pepper and a splash of lemon juice, then process until very smooth. Use as a dip for vegetables and chips, or as a sandwich spread.

3 Salsa: Dice and toss together 1 medium zucchini, 1 large tomatillo and 1/2 red or orange bell pepper. Add 1 tablespoon balsamic vinegar, a pinch of red pepper flakes, 1 tablespoon chopped pickled jalapenos and a splash of hot sauce. Season with salt and pepper.

4 Fries: Cut the zucchini into 1/2-inch-thick sticks, then toss them first in a beaten egg, then in seasoned bread crumbs. Arrange in a single layer on a baking sheet, then bake until crisp outside and just tender inside. As soon as they come out of the oven, sprinkle them with grated Parmesan cheese.

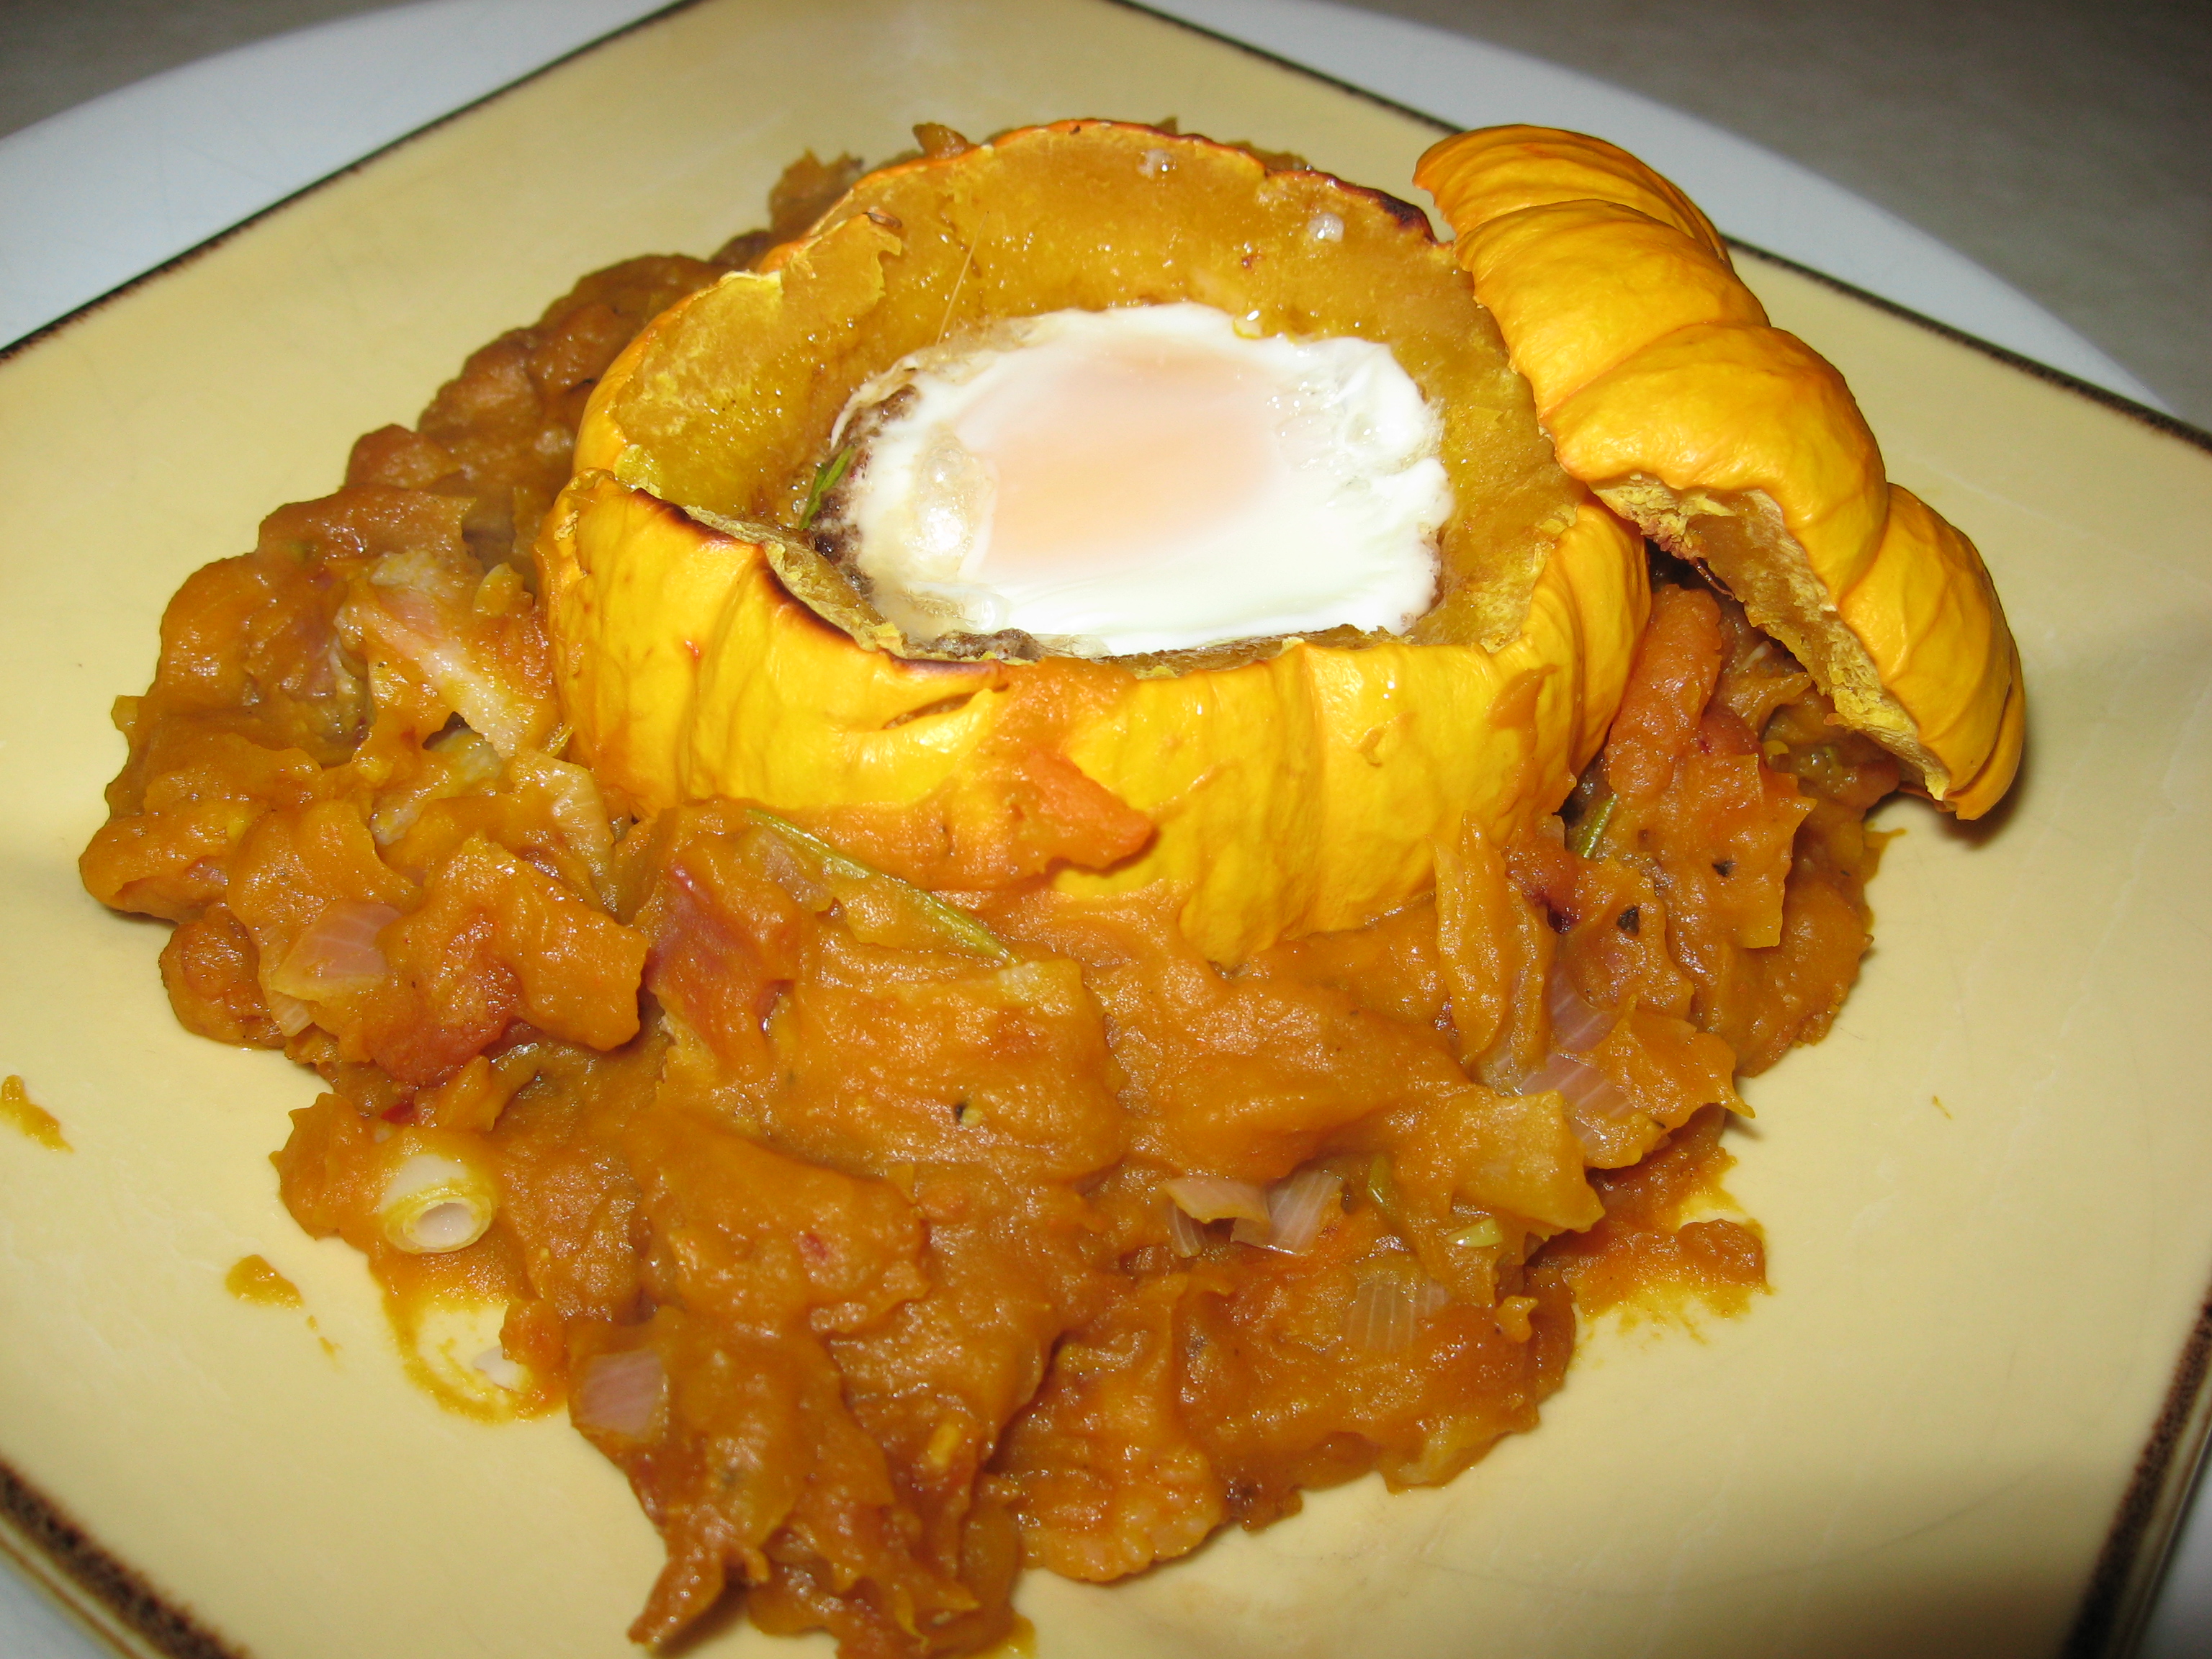
5 Boats: Slice a zucchini in half, then use a melon baller to scoop out the insides of each half. Mix together loose sausage meat, grated cheese and chopped sun-dried tomatoes. Pack the mixture into the hollowed out zucchini halves, then bake or grill (over low heat) until cooked through.

6 Frittata: Use a mandoline or food processor to slice the zucchini as thinly as possible. Whisk 6 or so eggs, then pour them into an oiled pan and cook over medium-high until the bottom is just set. Scatter the zucchini slices evenly over the top of the egg, then crumble feta over it. Broil until lightly browned and the center is set.

7 Grain salad: Toss finely diced raw zucchini with cooked and cooled farro or barley, halved cherry tomatoes, diced red onion and crumbled soft goat cheese. Dress with lemon juice, olive oil, salt and pepper.

8 Tart: Use a mandoline or food processor to slice the zucchini as thinly as possible. Unfold a sheet of puff pastry (thawed according to package directions). Run a paring knife along the outside of the pastry about 1 inch from the edge and cutting only halfway down. Arrange the zucchini slices in the center, then sprinkle with grated Parmesan. Bake at 400 F until puffed and lightly browned.

9 Chips: Use a mandoline or food processor to slice the zucchini as thinly as possible. Arrange the slices on a baking sheet, mist with cooking spray, then season with herbs, spices, salt and pepper, whatever you like. Bake at 375 F until the chips are nicely browned.

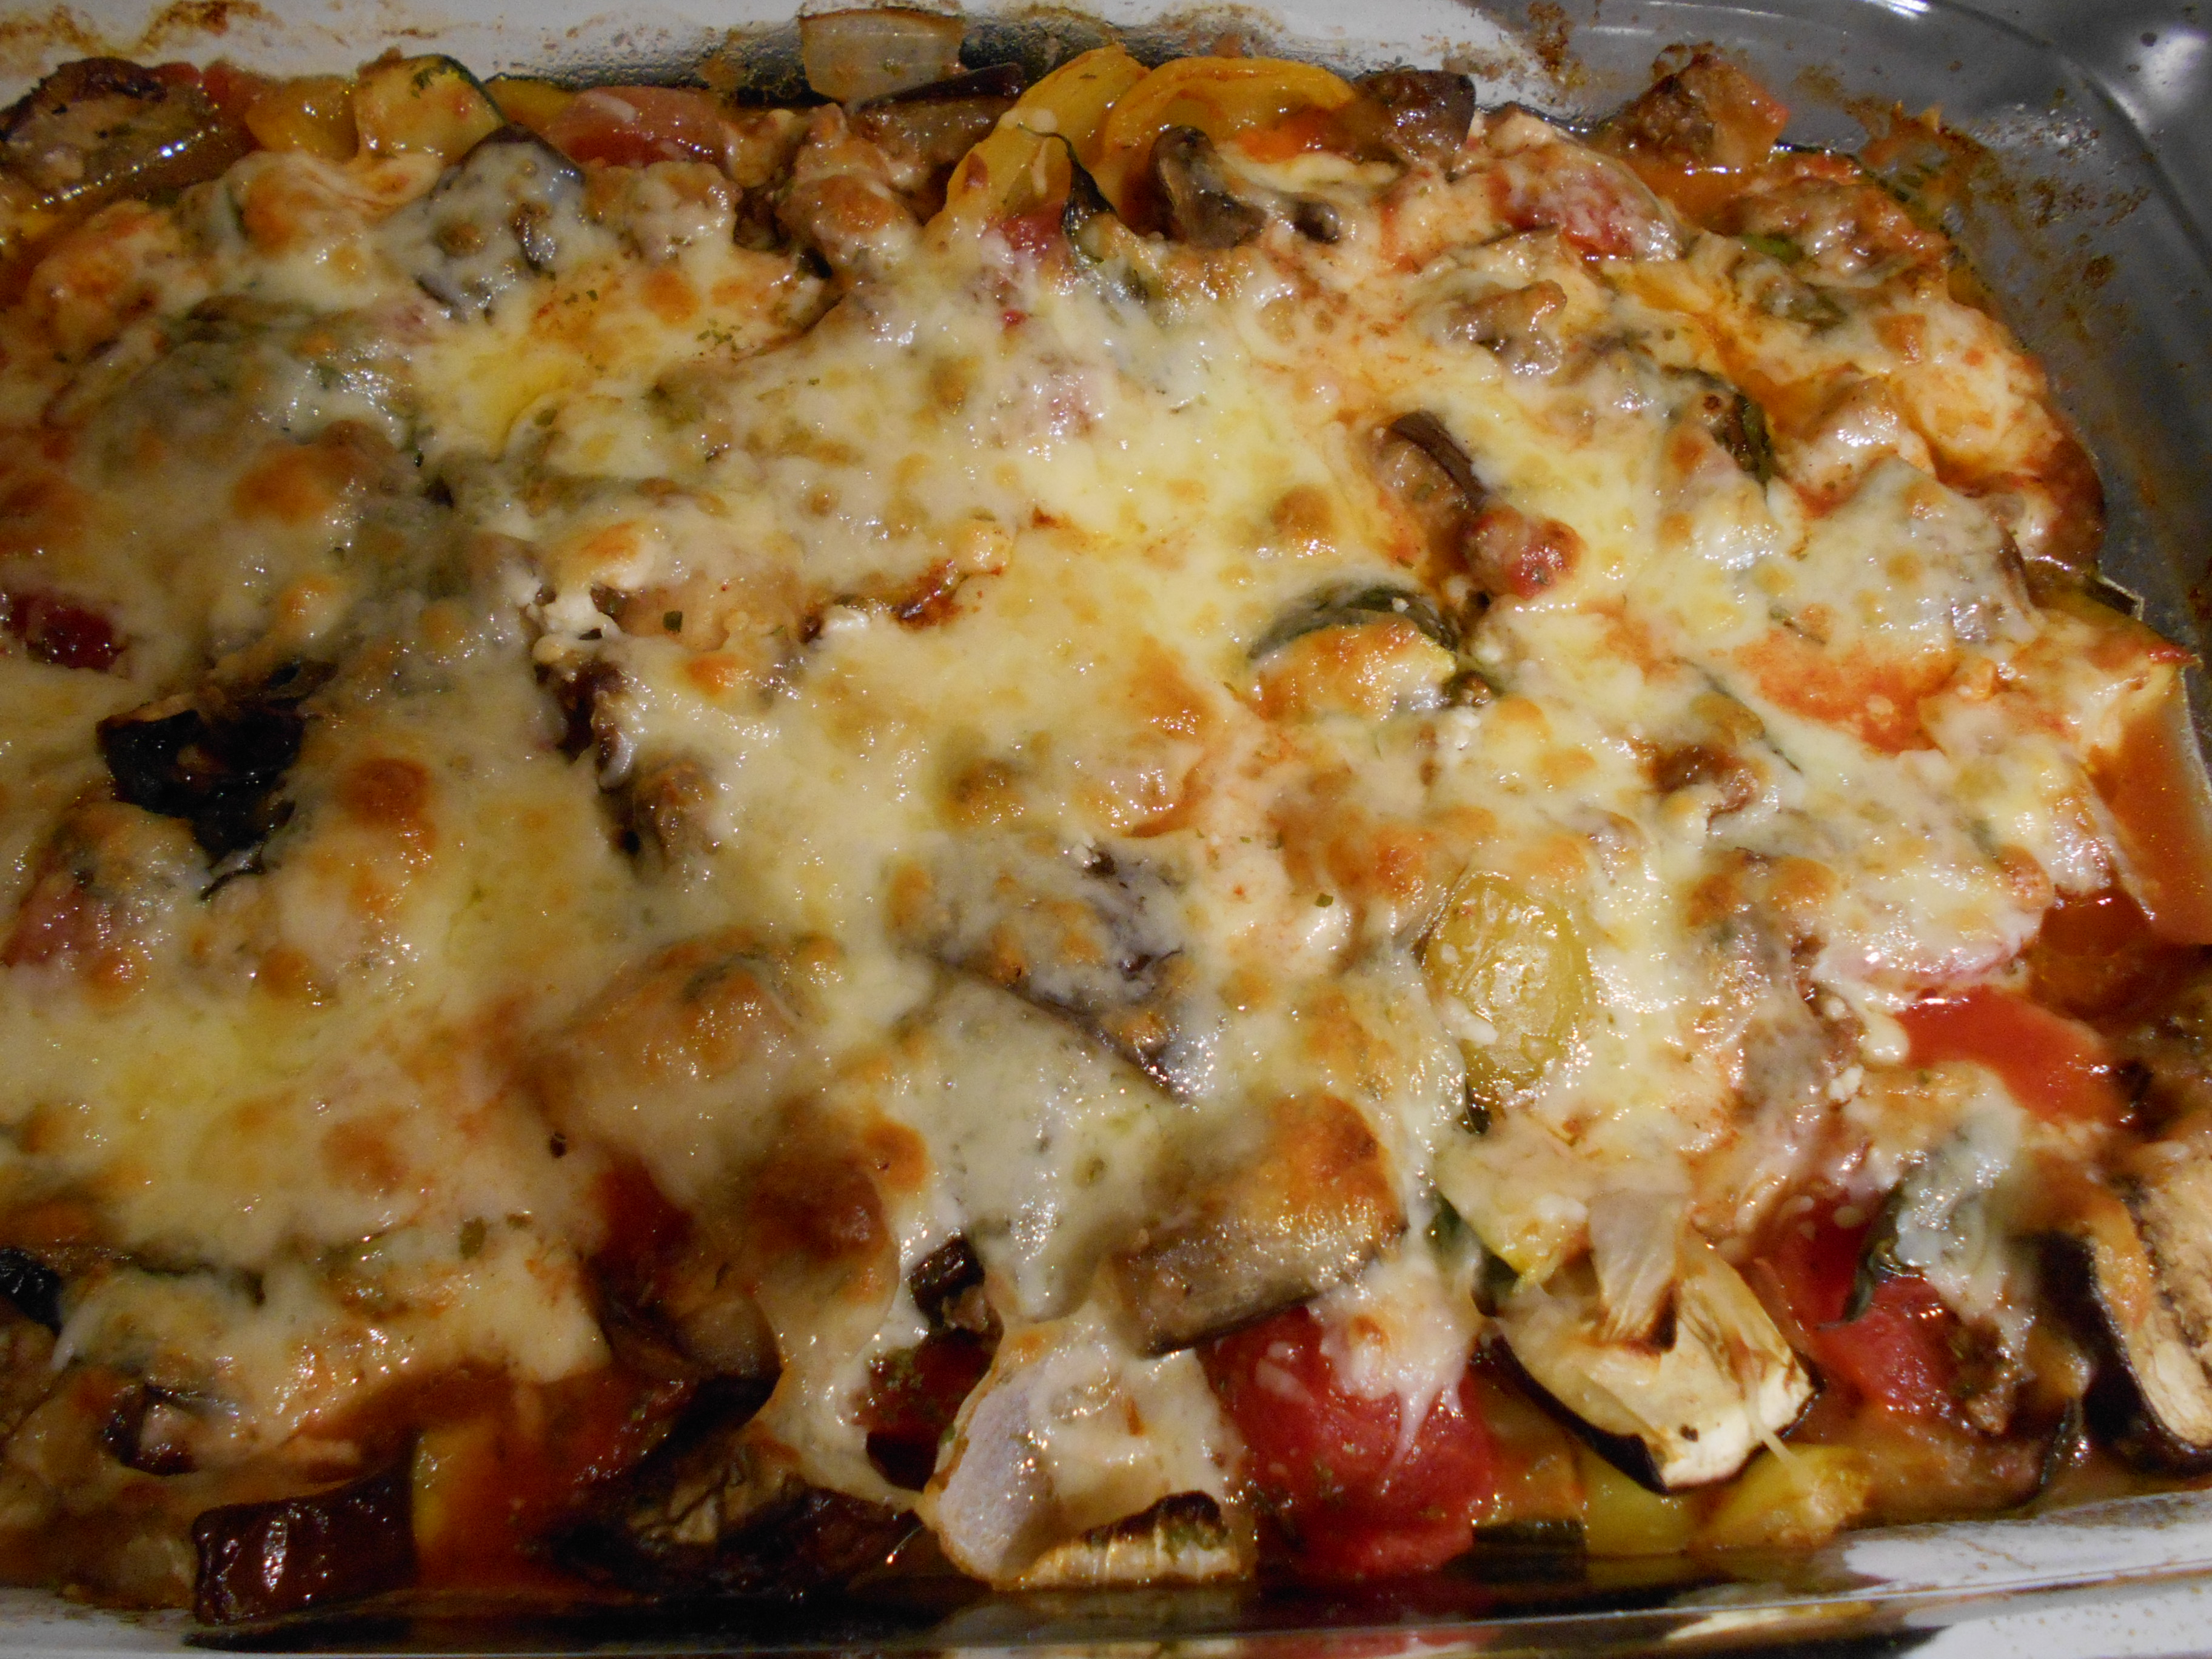
10 Casserole: Cut a whole mess of zucchini into 1/2-inch rounds. Arrange several layers of them in an oiled casserole dish. Top them with a bit of marinara and some ricotta cheese. Repeat this layering until you fill the casserole dish about three-quarters of the way. Bake at 350 F until tender, lightly browned and bubbling at the edges.

Israel Couscous Topped with Duck Egg and Parmesan Mustard Sauce

Standard


 DSCN0677 DSCN0684


Israel Couscous Topped with a Duck Egg and Parmesan Mustard Sauce

Serves 4

Breakfast does not always have to be the same if you get my drift, so one morning I thought that I wanted to enjoy some of those fabulous duck eggs that I had just purchased at our fabulous Wood River Sustainability Center (http://wrsustainabilitycenter.com/). I do hope that you all know about this center here in Hailey because it features the most wonderful local produce (and more) for you to buy and enjoy.


Pasta has always been one of my favorite foods and though I try to eat it in moderation, I do think that if you have pasta in the morning that’s probably the best time of the day to have it. I particularly enjoy the Israel Couscous and so here is a little dish that I created for a little brunch. By the way, if you have any of this left over pasta, you can sauté it quickly in some olive oil and it’ll become quite crunchy and excellent in a different way than you’ve had it in this dish.


So, this is the 1, 2, and 3 game plan: make the sauce first, then the asparagus, then the couscous and then put it together. I know, it looks like a lot of work, but really it isn’t—it’s actually a breeze to put together and best of all, it’s very yummy. Also think, you probably won’t make it on a daily basis—but then again, who knows?


Make the sauce first:

Ingredients for the sauce:

  1. 1 stick of butter (that’s not a daily thing either or is it?)
  2. 1/4 C. finely grated Parmesan
  3. 3 egg yolks (save the whites for my no churn ice cream recipe—look on my blog)
  4. 1/2 Tsp. salt
  5. 1/2 Tsp. dry mustard or 1/2 Tsp. Dijon (or more to taste)
  6. 1 Tblsp. lemon juice (or more to taste)

Directions for the sauce(easy, easy):

  1. Melt the butter and the Parmesan in a small saucepan over low heat or in the microwave but DO NOT LET IT BURN.
  2. Combine all the other ingredients in a blender and blend first and then drizzle in the butter/parmesan. The sauce will thicken. Taste and add in more whatever you wish. Transfer to a container and keep warm by putting the container in another bowl full of HOT water—stirring every now and then to keep smooth. It should be OK for the next 1/2 hour at least. Easy is the key to this good sauce.

Make the asparagus second (easy, easy again):

Ingredients for the asparagus:

  1. About 18 asparagus spears, trimmed and cut diagonally into 3/4 pieces
  2. 1-2 Tblsp. olive oil
  3. 1 minced garlic clove
  4. 1/2 Tsp. grated lemon peel

Directions for the asparagus:

  1. In a medium sized skillet, heat 1-2 Tblsp olive oil and add the asparagus, one minced garlic clove and the grated lemon peel. Sprinkle with S&P to taste and sauté until crisp-tender (about 3 minutes). Cover to keep warm.   Optionally of course you can oven roast the asparagus (see my blog for a full guide to oven roasting various veggies).

THIRD:Make the couscous and your 12 inch heavy skillet of some kind is the one you will be needing here.

Ingredients for the couscous:

  1. 1-2 Tblsp. olive oil
  2. 1 minced garlic clove
  3. 1 & 1/3 C. Israel Couscous (NOT the other kind)
  4. 2 C. vegetable broth (you’ll used 1 3/4 C for sure but may need some more)
  5. S&P to taste
  6. 4 duck (or other) eggs but honestly if you can get your hand on a duck egg—you’ll never forget that rich fabulous taste
  7. !/2 C. freshly grated Parmesan—for last minute topping
  8. 1/3 C. chopped chives (optional-for last minute topping)
  9. Paprika for last minute topping


Instructions for the couscous, eggs and the rest of the deal:

  1. In a 12-inch iron skillet (or something similar), heat 1-2 Tblsp. olive oil over medium heat. Add the couscous and sauté until most of couscous is golden brown (about 5 minutes)
  2. Add 1 3/4 C. vegetable broth, increase heat and bring to a boil. Reduce heat immediately to a medium-low, cover, and simmer until the liquid is absorbed and the couscous is tender (about 10 minutes). Watch to see that more broth might not be needed and if so add tiny bits (by tablespoons) until the pasta is done. When done, turn heat to very low and add and toss the asparagus into the couscous. Make 4 large indentations for the duck eggs.
  3. Break the eggs in your indentations and still over low heat, place the cover on the skillet and let the eggs cook (about 5 minutes—here in the mountains). They should be ready when the whites have congealed.
  4. At that point, take the skillet off the heat and sprinkle it all with the Parmesan ( and chives if you wish) and of course, a nice sprinkling of that lovely paprika.


SO__NOW______Bon Appétit (French) et Mange(Italian)   So there you go, a bit of multilingual whatever and what more could you expect from a Swiss woman?


Margot is a self-taught enthusiastic & passionate cook. Having been an inn-keeper for 5 years at her own inn, she accumulated a lot of good recipes which she loves to share.


Be sure to take a minute to visit Margot’s blog http://blog.tempinnkeeper.com for over 200 more simple and delicious recipes. You also can call Margot for personal cooking help or hosting for small B&B kinds of food gatherings. Margot’s phone number is: 208-721-3551. Friend Margot on Facebook and also find her on Linkedin,Twitter,Pinterest and other social sites.


Bread Pudding with Whiskey Sauce

Standard

DSCN0471

Bread Pudding with Whiskey (or whatever flavor you prefer) Sauce
Serves 8 to 10 serving
Ingredients:
• 1 pound loaf Soft French Bread Loaf or Challah bread,( crusts trimmed if you wish however I don’t do that), bread cut into 1-inch cubes.
• 8 eggs
• 1 ½ C. whipping cream
• 2 ½ C. whole milk
• 1 ¼ C. sugar
• Optional: Some whole caramelized (by you) pecans to add after you have baked the dish
• Optional: 1 drained can of fruit cocktail if you wish to make it “Deep Southern”. Sprinkle the fruit on the pre-baked pudding after you have poured the custard over it. Then press down all to make sure all is submerged. When serving in this manner, place a mint leaf on top of all.

Directions for Bread Pudding:
• Preheat oven to 350 degrees DSCN0473
• Lightly butter a 13X9X2-inch baking dish
• Arrange the bread cubes in the prepared dish
• In a large bowl, whisk the eggs, cream, milk and sugar to blend.
• Pour the custard over the bread cubes, and press the bread cubes gently to submerge.
• Let stand for 30 minutes, occasionally pressing the bread cubes into the custard mixture.
• Cover and refrigerate for at least 2 hours up to overnight.
• After 2 or more hours, remove dish from frig. and bring up to room temp.
• Bake until the pudding puffs and is set in the center, about 45 minutes. Here in our altitude it took almost 60 minutes.

Ingredients for your sauce:
• ½ cup whipping cream
• ½ cup whole milk
• 3 tablespoons sugar
• ¼ cup amaretto or whatever liquor you prefer
• 2 teaspoons cornstarch

Directions for the sauce:
• Bring the cream, milk, and sugar to a boil in a heavy small saucepan over medium heat, STIRRING FREQUENTLY.
• In a small bowl, mix the amaretto and cornstarch to blend and then whisk into the cream mixture.
• Simmer over medium-low heat until the sauce thickens, STIRRING CONSTANTLY, about 2 minutes.
• Set aside and keep warm.
• This sauce can be made 3 days ahead. Cover and refrigerate and re-warm before serving.

End result:
Spoon the bread pudding into bowls, drizzle with the warm amaretto sauce, serve, and don’t plan for any left-over’s.


Eggs in Mini Pumpkins with Squash or Sweet Potato Hash

Standard

Eggs in Mini Pumpkins with Squash or Sweet Potato Hash

mini-pumpkin, egg and squash hashegg in mini pumpkin w sweet potato hash

Serves 4

Left picture with squash; right one with sweet potato

This is probably not a dish that you will make more than once or twice a year, but for around Halloween or Thanksgiving, it’s a colorful and yummy dish with which to surprise your family and overnight guests for a breakfast or brunch. It’s a pretty and unique dish to serve and I think just plain memorably fun.

Ingredients:

  1. 4 mini orange pumpkins (4 inches in diameter) which you’ve cut about 1/3rd of the way down, seeded and spoon-scraped clean the insides so that an egg will fit in nicely. The pumpkin inner flesh is delicious to eat with the egg. SAVE THE TOPS FOR DÉCOR and if they have a stem, all the better.
  2. 1-2 Tblsp. olive oil for the frying pan
  3. 1 small package cut up fresh squash and cut up even smaller by you into 1/2 inch diced pieces or 1 sweet potato peeled and coarsely shredded or grated.
  4. 1/2 C. onion or shallot, minced
  5. 1 red pepper cut longwise into slender strips
  6. 1/2 C. uncooked bacon, diced or Black Forest ham diced
  7. 1/2 C. olive oil
  8. 1/4 C. balsamic vinegar
  9. 1-2 Tsp. red chili flakes
  10. 2 cloves garlic, minced
  11. 2 Tblsp. fresh sage or rosemary, minced
  12. S&P
  13. 4 large eggs

Instructions:

  1. Preheat oven to 375 the day of serving.
  2. In a small bowl whip together the olive oil, vinegar, chili flakes, garlic cloves and sage or rosemary. Reserve about 2 Tblsp. to either brush on the bottom of the pumpkins before placing in an egg or to drizzle on top of your egg when the egg is cooked.
  3. In a medium sized frying pan, heat up the 1-2 Tblsp. olive oil and sauté the onion or shallot along with the red pepper strips until both are softened (about 5 minutes).
  4. Add the vinaigrette to the onion/red peppers and quickly add the sweet potato or squash; gently stir everything so well mixed.  Cook over medium heat, stirring occasionally, uncovered until softened and tasting pretty good (about 10 minutes).  At this point you can put a lid over the skillet to keep warm until you serve your egg/pumpkin or you can refrigerate it and reheat it with the pumpkins and eggs when you cook them. If you refrigerate the hash, let it come to room temp before putting in the oven with the pumpkins. Baking the hash in the oven will crispen the hash and you may prefer it like that.
  5. The day of serving, for the pumpkins, line a baking sheet with foil and place them on the foil lined baking sheet, cut side down.
  6. Bake the pumpkins on the sheet for 15 minutes. Remove from oven.
  7. Turn the pumpkins right side up on your baking sheet and if you wish, brush the inside of the pumpkins with a little of the leftover vinaigrette and season with S&P or save the vinaigrette for top of the egg drizzle when the egg is cooked. Crack one egg into the center of each pumpkin and if you wish to have a crisper hash or need to reheat your room temp hash, single layer that around your pumpkins.
  8. Return the baking sheet to the oven and continue baking until the eggs are almost set—around 15 minutes.  Start keeping a close eye on them about 10 minutes on and remember that when the pumpkin is out of the oven, the eggs will cook a bit more inside the hot pumpkins.
  9. To serve: Spoon the hash onto plates and nestle the pumpkins in the center. Lean one pumpkin top on the side of each pumpkin.  Drizzle a bit of the vinaigrette on top of the egg if you desire.

Florentine Crusted Quiche

Standard

crustless quiche

crustless missing one piece

Florentine Crusted Quiche

Serves 6


It’s nice to enjoy a really tasty quiche that you know is totally healthy for you as well as light caloric wise.  Thinking about this crust, which is made with spinach, chard, or any of that similar green leafy veggie, Catherine de Medici of the early 16th Century comes to mind.  She was an amazing woman for her time and age and still today would be.  When she became queen of France, she so loved her spinach that she insisted it be served for every one of her meals.   Catherine originally haled from Florence, Italy and therefore, her many spinach dishes created and made with spinach by her French chefs were named Florentine.   So full circle here—you can see why I’ve named this quiche Florentine Crusted Quiche.

Crust Ingredients:

  1.  2 Tblsp. Olive Oil
  2. 1/2 Onion sliced very thin
  3. 1 ½ C. thinly sliced mushrooms
  4. 1 C. washed and packed chopped spinach, chard or any other green that suits your fancy
  5. 1/2 Tsp. salt and black pepper
  6. 2 Tblsp. cornmeal
  7. 2 Tblsp. water

Filling Ingredients:

  1. 6 eggs
  2. 1/2 C. milk or half-half or cream—can be fat-free—up to you.  Of course, the richer the yummier
  3. 1/4 Tsp. salt and black pepper
  4. 1/4 Tsp. nutmeg or another of your favorite spice to accommodate your cheese choice
  5. 3/4 C. of your favorite shredded cheese
  6. 3/4 C. diced ham or bacon bits or whatever suits your fancy (optional)

Directions:

General Initial Directions:

  1. Pre-heat the oven to 350.   Place one rack in the middle position.
  2. Oil or spray a 9-inch cooking dish that will accommodate a quiche.

Crust Directions:

  1. In a large skillet heat the olive oil and then add the onion stirring till nice it is brown and glossy (about 3-4 minutes); then add the mushrooms and stir them until well moistened and browned  (about 5 minutes); then add your greens and S&P and cook till the greens are nicely wilted; then add the cornmeal and water and stir till the total mixture is well blended.
  2. 2.       Press the above on the bottom and up the sides of your prepped cooking dish.

Filling Directions:

  1. Beat eggs, cream and S&P thoroughly.
  2. Fold in cheese and diced ham or bacon.
  3. Pour filling into your prepared dish.

Very Final Directions:

  1. Place the quiche on the middle rack in the oven for about 1 hour.  Test the middle for it being done with a toothpick or fine knife for it to come out clear.
  2. Let the quiche sit for 10-15 minutes before serving.


Huevos en Avocados

Standard

Huevos en Avocados

avocados y huevos Up To You To Determine The Amounts To Serve

Well priced avocados still are bountiful at Atkinsons’.  They are a nice large size and delicious tasting so here’s another easy and yummy recipe for anytime really—but of course perfect for breakfast.  I serve this with warm tortillas, but a crusty baguette or toasted English muffin would also make a nice accompaniment.

Ingredients:

  1.  Avocados— as many as you wish
  2. Eggs—as many as you wish
  3. Diced cooked ham or bacon (of you can fry the bacon stove top while your dish is in the oven and sprinkle the bits over the avocados when they are done) (optional)
  4. Chopped green onions—the whole thing
  5. Fresh cracked black pepper (optional)
  6. Paprika and/or Chili powder (optional)
  7. Mexican shredded cheese (optional)
  8. Salsa (optional)

Directions:

  1. Pre-heat oven to 425
  2. Line your desired baking dish that you will be using with aluminum foil.
  3. Cut the avocados in half, length wise.  If there is not enough of a dip in the avocado to hold an egg, take some of the flesh out so that you’ll have a nice dip.
  4. Place the avocados in the dish and place a cracked egg in each.  Some of the white may run over, but that’s OK.
  5. Top the avocado and the inserted egg with your options listed in the ingredients. You might think of even more options, such as sour cream, etc.
  6. Place the dish in the oven for 20 minutes.  You can see if you like the results at 15 minutes, but mine is perfect in 20 minutes.

Buen appétit!!!!


For easy access and printing of this and past recipes, visit Margot’s blog http://blog.tempinnkeeper.com  Call Margot for personal cooking help or hosting

 @ 721-3551.

Margot is a self-taught enthusiastic & passionate cook. Having been an inn-keeper for 5 years at her own inn, she accumulated a lot of good recipes which she loves to share.

Strawberry-Nut Quick Bread

Standard

strawberry nut quick bread

Strawberry-Nut Quick Bread

Makes one 9 X 5 Loaf

I found some very sweet and tasty California strawberries at the Ketchum Atkinsons’ store at a nice price- under $2 for a 1 lb. Clamshell.  So, I of course ate some fresh but the thought of making this very tasty quick moist bread came to mind, so I did create a half a loaf, just for me.  With some whipped cream cheese as a topping, it was delicious.  Of course, I wanted to share this easy recipe so here it is.

Ingredients:

  1. 2 eggs
  2. 1 C. sugar
  3. 1/2 C. oil
  4. 1 ½ C. all-purpose flour
  5. 1 Tsp. baking soda
  6. 2 Tsp. cinnamon
  7. 1/2 Tsp. salt
  8. 1 ½ C. of your favorite chopped nuts
  9. 10 Oz. sliced strawberries –fresh preferably but they can be frozen

Directions:

  1. Pre-heat the oven to 350 and oil well a 9 X 5 X 3 loaf pan.  I also sprinkled some sugar on the bottom.
  2. Beat eggs, sugar and oil until well combined.
  3. Mix together well the flour, soda, cinnamon and salt.  I use my whip for this.
  4. Beat or mix all until well blended.  Batter will be thick.
  5. Add the berries and chopped nuts.
  6. Spread the batter in the pan and bake on the middle rack for 55 to 65 minutes.  For half a loaf, I used the same sized pan so the break turned out a bit less thick and it baked in about 40-45 minutes.
  7. Let cool in pan for about 10 minutes and remove to a wire rack. 

For easy access and printing of this and past recipes, visit Margot’s blog http://blog.tempinnkeeper.com  Call Margot for personal cooking help or hosting

 @ 721-3551.

Margot is a self-taught enthusiastic & passionate cook. Having been an inn-keeper for 5 years at her own inn, she accumulated a lot of good recipes which she loves to share.